Showing posts with label Country Hollow Creations. Show all posts

Tuesday, October 13, 2009

CHS Designer and CT Call


We have 3 different contracts to choose from
75/25
Non Exclusive Designer,you may sell at other stores and may sell your products at other stores that you sell at CHS.
85/15
Your a Exclusive Designer to CHS
You can only sell at ChS and nowhere else
80/20
Your not a exclusive Designer to CHS,But the products you sell at Chs are to be exclusive you may sell in other stores but not the products you sell at CHS.

Lead Designer Call Also
For Lead Designer,It would contsist of reg Designer selling your products of course ,Also keeping Designer Blog Updated,with Designer Blinkies,News of the store,Sales going on Ect.
Choosing Designer Of The Month.setting up with them what they will do for there month,getting together with the DOTM to talk about what they will do for there month,Sale,Freebie or whatever,send out the ad about the dotm,post them on the Blog,Forum and such ,get ads together for when we have store wide sales ,send them out before the sale to ad groups,forums and places where they can be posted,we only have 5 store wide sales a yr so that should be easy,Help me set up special contests and such and help with ideas for them and such,interacting with the designer group,praising them on there new products,answering questions when you can,posting in our gallery leaving comments on our CTS layouts and such every few days,and just helping the owner out when needed,will get 20 voucher for anything in store Ont he first of the month for your help,and special surprises from me each month also.if interested email charly@countryhollowscraps.com with CHS lead desiger in subject line with alittle about yourself and where you sell if anyplace link toy our blog and if you have done anything like this before no prior experience needed though.
CT Call for CHS
Want to CT For a wonderful Store with Great Designers?
CHS is looking for some more CT members to add to our already wonderful team
Tut writers,Layout and Tag Makers wanted
Work with atleast 2 kits per month more if wanted
Post in 3 places
Make atleast 1-2 layouts and or tags per kit
Or if your a tut writer
Atleast one tutorial per kit
Blog about our store,AND our Store Designers and products as much as possible on your Blog.
If your interested
Please email getcreative@countryhollowscraps.com with chs CT call in subject line
Alittle about yourself
Your blog link and a few links to your best gallerys,names of cts your on now if any,
Newbies welcome you have to start somwhere right?how about at CHS?

Monday, October 5, 2009

Harvest Twist


Artist © Suzanne Woolcott AKA Gorjuss.
In order to use the image in this tutorial you MUST purchase it from her site

SCRAPKIT: Harvest Twist by Country Hollow Scraps

MASK: Of choice

Open new image 600 x 500

Open Paper 4
Copy and close
Select all
New raster layer
Paste into selection
Apply your mask
Merge group

Open frame 1
Copy and close
Paste as new layer
Open paper 7
Copy and close
Get your magic wand and select the insides of the frame
Expand by 6
New raster layer
Paste into selection
Move beneath the frame
Apply your drop shadow to the frame
2, 2, 40, 3, black

Open your pumpkin3
Copy and paste as new layer
Apply drop shadow, same settings

Open your leaves
Place them behind your frame

Open the flowers
Resize them with the largest side 100 px
Copy and close
Paste as new layer
See my tag for placement

Open your tube
Copy and close
Paste as new layer
Apply drop shadows to all your layers

Add your copyright and text
Merge visible and your done :-)

Tuesday, September 29, 2009

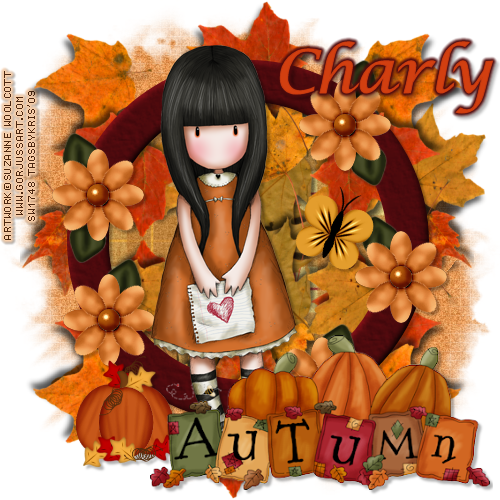
Autumn Delights


Artist © Suzanne Woolcott AKA Gorjuss.
In order to use the image in this tutorial you MUST purchase it from her site

SCRAPKIT: Autumn Design by Country Hollow Scraps

MASK: Of choice

New Image 500 x 500

Open Paper 10
Copy and close
Paste as new layer
Apply mask of choice

Open circle frame 1
Copy and close
Paste as new layer

Get your magic wand
Select the inside of your frame
Expand by 6
Open paper 2
Copy and close
New raster layer
Paste into selection
Move paper layer beneath the frame
Apply drop shadow to your frame layer
3, 3, 30, 3, black

Open your tube of choice
Copy and close
Paste as new layer
Add drop shadow to your tube
3, 3, 30, 3, black

Select your paper inside the frame layer
Open your leaves
Copy and paste them
Until you have the desired amount behind your tag

Select your top layer
Open your autum pumkin
Resize by 40%
Copy and close.
Paste as new layer.
Add drop shadow 3, 3, 30, 3, black

Add your copyright and text
Merge visible and your done.

Monday, September 28, 2009

Bunnylicious


SCRAPKIT: Bunnylicious by Country Hollow Creations

Artist © Elias Chatzoudis.
In order to use the image in this tutorial you MUST purchase it from MPT

MASK: Of choice.

New Image 600 px x 450 px

Open paper 12
Copy and paset as new layer
Apply mask of choice
Merge visible

Open frame 1
Copy and paste as new layer

Get your magic wand and select the inside of the frame
Expand by 6
Open paper 6
Copy and close
New raster layer
Paste into selection
Move the layer beneath the frame
Apply drop shadow to your frame layer
3, 3, 30, 3, black

Open up your flower 3
Copy and close
paste as new layer
Drag layer beneath the frame
Duplicate - mirror
Merge down
Duplicate - flip
Merge down

Open your tube
Copy and paste as new layer
Get your square selection tool and select her top
Copy and paste as new layer
Drag between the frame and paper
Blend mode - Luminance (L)
Duplicate and mirror

Apply drop shadows to all those layers

Add your flower, resize with the largest side 125 px
Copy and paste as new layer
Move inbetween the frame and large tube
Add your drop shadow
Duplicate and mirror

Add any other elements you want

Add your copyright and text
Merge visible and your done.

Saturday, August 8, 2009

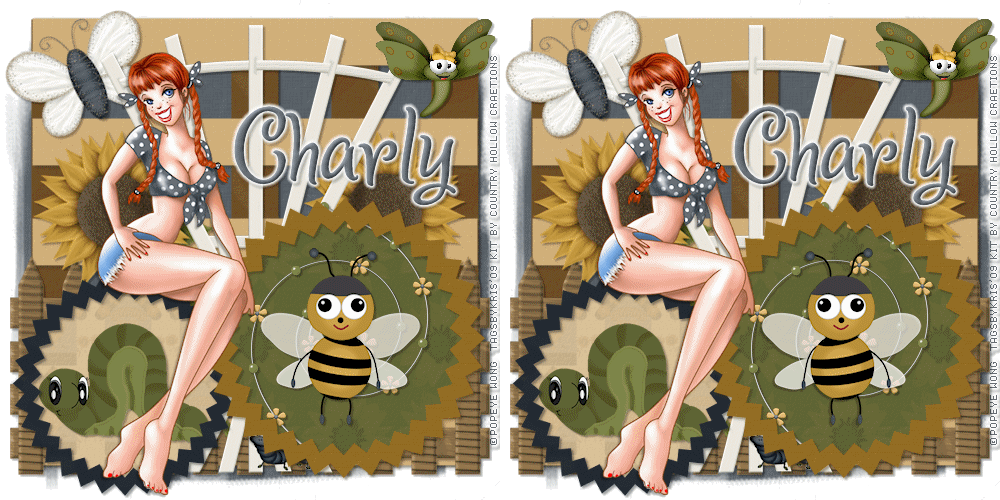
Country Boogie Tutorial


SUPPLIES:

Scrapkit: Splash of Sunflowers by Country Hollow Creations

Template: Template51 by Simply Devilish Scrapz

Tube: FTU Popeye Wong
My colorized version HERE

OK lets begin...

First we need to prepare our tube

Popeye Wong is one of my favorite artist because he allows us to not only use his wonderful work for free but color alter to fit our needed. On this tutorial, we'll be coloring her clothes to match our kit.

Open your tube. I'm using Orange-Juice
Take your magic wand with the following settings and select the red parts of your tube (her clothes)
I find it easier just to duplicate your tube and select the general area with your lasso tool and then delete the part that shouldn't be colored but you can do this however you feel the most comfortable.

Of course, if your just feeling lazy and don't wanna do this, you can use the tube in my supplies already colorized.

Colorize

Image and video hosting by TinyPic

Manual Color correction

Image and video hosting by TinyPic

OK now that we're done with that minimize your tube
Open up your template
CTRL+D to duplicate
Close the original
Delete the copyright layer
Open paper 8
Copy and close
Select the stripe layer
Select all - float- defloat
New raster layer
Paste into selection
Delete the template layer

Do the same with the other layers using papers of choice

Add your elements as you wish. See my tag for placements

I deleted the top circle but you can leave it if you choose to do so

Apply your mask if desired

Add your copyright and text
Copy merged

Open animation shop and paste as new animation

Go back to psp, select your bee layer and duplicate
Mirror and move it on top of the other bee
Delete the other be and copy merged

Go back to animation shop
Paste after the current frame
Ctrl + A
Alt + enter
Change it to about 35

Save and your done.

Friday, July 24, 2009

Learning is a Treasure Tutorial


SUPPLIES

TEMPLATE: Template #1 by Scraps by CWD

SCRAPKIT: Welcome Spring by Country Hollow Creations

Artist © Daniel Esparza.
In order to use the image in this tutorial you MUST purchase it from CILM

WORDART: By me: HERE

PLUGINS: Toadies - Where are you

TUTORIAL:

Okay lets begin.

Open your template
CTRL+D to duplicate
Delete copyright information layer

Go to your tag background layer
Open paper 9
Copy, paste as new layer
Select the tag background layer again
Select all - float - defloat
Select paper layer
Invert and delete
delete the original image layer

Do the same for the following layers

dotted lines - paper 7
circle - paper 4
circle frame - paper 3
rectangle frame and rectangle - delete
mid square - paper 12
mid square frame - paper 3
left square - paper 11
right square - paper 910
right square frame - paper 9
left square frame - paper 2

Open your tube of choice
copy and paste as new layer
Move under the desired frame
Erase the parts on the outside of the frames
Repeat for the other two frames

Open string flower
Resize by 15%
Copy and paste as new layer
See my tag for placement
Do this again but move it to the other frame

Open daffodil resize 27%
See my tag for placement

Insert your wordart
Add your copyright and text

Close off your circle layer and white bg layer
Merge visible
Open up your closed layers
Select circle layer
Select all - float - defloat
merge down
Duplicate x3
Toadies - Where are you - ok
Repeat - change the overdose higher
Repeat - change the overdose even higher

Duplicate your type layer x2
Move one layer on top of the bg layer and merge down
repeat for your other layers
Save as a pspanimation

Open up animation shop
your speed should be about 30
save as a gif and your done


Friday, April 24, 2009

Sunflower Dreams

Tags by Kris

This adorable kit is from Country Hollow Creations.
The cute bear is from DudleysBearDen.
QuickPage can be found here.


Thursday, April 9, 2009

Froggy Friends

The kit used for this tag and quick page is called Breast Cancer Charity Kit from Country Hollow Creations. This cute kit can be found at the Country Hollow Scraps store. Click on the quick page to snag it. The little angel in this picture is my daughter, Cali Rose when she was 2 :)


Saturday, April 4, 2009

Glitter Bug Freebies

Glitter Bug Freebies from Charly's Sweet Bear Kit, either right click the PNGs here and save or click here

Bear Hugs Tutorial


Image and video hosting by TinyPic

PTU Sweet Bears Kit Scrapkit by Charly@Country Hollow Scraps

Artist © Nolan Worthington.
In order to use the image in this tutorial you MUST purchase it from AMI

Mask: Of choice

New Image 700 x 510 white background (we'll resize later)

Open your mask of choice up in PSP

Chose a paper or color for your mask layer

Copy the paper and paste as a new layer on your blank canvas

Layers-mask image-from image

Chose your image and press ok

Layers - merge - merge group

Open up your frame of choice

Resize by 120% and move it in the center of your mask

Add drop shadow (3, 3, 35, 5, black)

Resize your image

Image and video hosting by TinyPic

Resize your canvas

Image and video hosting by TinyPic

Flood fill your bottom layer with white

Add your main tube

click on the frame layer

select all, float, defloat

click on the tube layer

select eraser tool, erase the bottom part of the tube that is touching the frame

merge visible

Add your elements (see my tag for examples)

Add your proper copyright and text.