Showing posts with label Country Hollow Store. Show all posts

Saturday, October 17, 2009

Endless Love


ARTWORK: Artist © Elias Chatzoudis
In order to use the image in this tutorial you MUST purchase it from MPT

SCRAPKIT: Endless Love by Lisa aka Aleahs Mommy Designs

TEMPLATE: Designs by Ali

PHOTO: HERE

The tutorial can be found HERE

Monday, October 5, 2009

Harvest Twist


Artist © Suzanne Woolcott AKA Gorjuss.
In order to use the image in this tutorial you MUST purchase it from her site

SCRAPKIT: Harvest Twist by Country Hollow Scraps

MASK: Of choice

Open new image 600 x 500

Open Paper 4
Copy and close
Select all
New raster layer
Paste into selection
Apply your mask
Merge group

Open frame 1
Copy and close
Paste as new layer
Open paper 7
Copy and close
Get your magic wand and select the insides of the frame
Expand by 6
New raster layer
Paste into selection
Move beneath the frame
Apply your drop shadow to the frame
2, 2, 40, 3, black

Open your pumpkin3
Copy and paste as new layer
Apply drop shadow, same settings

Open your leaves
Place them behind your frame

Open the flowers
Resize them with the largest side 100 px
Copy and close
Paste as new layer
See my tag for placement

Open your tube
Copy and close
Paste as new layer
Apply drop shadows to all your layers

Add your copyright and text
Merge visible and your done :-)

Tuesday, September 29, 2009

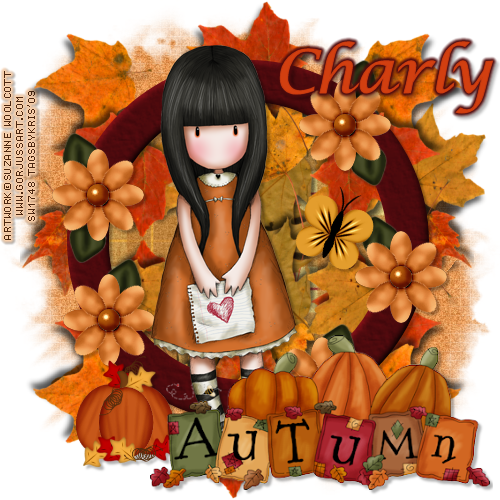
Autumn Delights


Artist © Suzanne Woolcott AKA Gorjuss.
In order to use the image in this tutorial you MUST purchase it from her site

SCRAPKIT: Autumn Design by Country Hollow Scraps

MASK: Of choice

New Image 500 x 500

Open Paper 10
Copy and close
Paste as new layer
Apply mask of choice

Open circle frame 1
Copy and close
Paste as new layer

Get your magic wand
Select the inside of your frame
Expand by 6
Open paper 2
Copy and close
New raster layer
Paste into selection
Move paper layer beneath the frame
Apply drop shadow to your frame layer
3, 3, 30, 3, black

Open your tube of choice
Copy and close
Paste as new layer
Add drop shadow to your tube
3, 3, 30, 3, black

Select your paper inside the frame layer
Open your leaves
Copy and paste them
Until you have the desired amount behind your tag

Select your top layer
Open your autum pumkin
Resize by 40%
Copy and close.
Paste as new layer.
Add drop shadow 3, 3, 30, 3, black

Add your copyright and text
Merge visible and your done.

Monday, September 28, 2009

Bunnylicious


SCRAPKIT: Bunnylicious by Country Hollow Creations

Artist © Elias Chatzoudis.
In order to use the image in this tutorial you MUST purchase it from MPT

MASK: Of choice.

New Image 600 px x 450 px

Open paper 12
Copy and paset as new layer
Apply mask of choice
Merge visible

Open frame 1
Copy and paste as new layer

Get your magic wand and select the inside of the frame
Expand by 6
Open paper 6
Copy and close
New raster layer
Paste into selection
Move the layer beneath the frame
Apply drop shadow to your frame layer
3, 3, 30, 3, black

Open up your flower 3
Copy and close
paste as new layer
Drag layer beneath the frame
Duplicate - mirror
Merge down
Duplicate - flip
Merge down

Open your tube
Copy and paste as new layer
Get your square selection tool and select her top
Copy and paste as new layer
Drag between the frame and paper
Blend mode - Luminance (L)
Duplicate and mirror

Apply drop shadows to all those layers

Add your flower, resize with the largest side 125 px
Copy and paste as new layer
Move inbetween the frame and large tube
Add your drop shadow
Duplicate and mirror

Add any other elements you want

Add your copyright and text
Merge visible and your done.

Wednesday, September 2, 2009

Fall Greetings


SCRAPKIT: Fall Splendor by Stacey's Designs

Template: #9 Bel Vidotti

TUBE: Artist © Joel Adams
In order to use the image in this tutorial you MUST purchase it from CILM

Mask: Of Choice

Okay lets begin...

Open your template
CTRL+D to duplicate
Close your original
Delete your copyright information

Select the bottom layer
Open paper of choice, copy and close
Select all float, defloat
New raster layer
Paste into selection

Do the same for the rest of the layers.

Open your flower of choice, resize it by about 50ish%
place it on one of the outsides of the template flower
Duplicate and move around your flower until you have a complete circle

Add your elements, tube, and copyright information

Apply your drop shadows and/or gradient glows

Add your text and your done.


Saturday, August 29, 2009

Tranquility

Image and video hosting by TinyPic

SUPPLIES:

TEMPLATE: TagTemplate48 by Missy

TUBE: Artist © Cris de Lara.
In order to use the image in this tutorial you MUST purchase it from MPT

SCRAPKIT: Tranquility by Tantalizing Designz

BLING: Made by Me but I lost the file, so any heart bling will do.

Okay lets begin...

Open your template
CTRL+D to duplicate
Close your original
Delete your copyright information
Resize canvas to 500 x 500

Select the bottom layer
Open paper 21, copy and close
Select all float, defloat
New raster layer
Paste into selection

Do the same for the rest of the layers.

When you get to your frame layer
Select a color from your tag
New raster layer
Frame layer - select all - float - defloat, invert
Select the color layer - and hit delete

Add Gradient Glow to all your layers
I used the color #6b5957
Add drop shadow 2, 2, 30, 3 black

Add your tube and drop shadow

Add some elements and copyright also any text you want
Pretty much finish up your tag before we add the bling
After your done, merge your tag

Save as pspanimation
Open your bling and tag up in AS
Delete the black layer on your bling
Duplicate your tag until you have 18 frames
Select all on both
Drag your bling onto your tag
Save as a gif and your done.

Thanks for trying my tutorial. I'd love to see your results.

Monday, August 10, 2009

Princess with an Attitude


SUPPLIES

TEMPLATE Template 36 by Kristin

TUBE: Artist © Amanda Fontaine
Her art is no longer available but I purchased it from AMI

SCRAPKIT: Boneheads by Tygers Tidbits

Okay lets begin

Open your template
CTRL+D to duplicate
Close your original
Delete your copyright information

Select your rectangle fill layer
Select all, float, defloat
Open paper 11, copy and close
New raster layer
Paste into selection

Select your stars layer
Do the same as above but use paper 10
Selecty your word layer and use the following settings to turn it black
Also do this to your smaller words

Gradient glow to the bigger words and drop shadow
Use the gradient glow and drop shadow for the stars and black skull

Open glitter splat 2
Resize to an appropriate size
copy and paste
Move right on top of your white layer
Image duplicate - mirror
Merge down
Duplicate - flip

Do the same for confetti4

Merge visible
Add your tube, text and copyright

Thanks for using my tutorial.
I hope it was quick and easy for you.

Sunday, August 9, 2009

Crazy, Sexy, Cool

Image and video hosting by TinyPic

SUPPLIES:

Template: MC_Template37

Scrapkit: Love Hurts by Tootsie's Creationz

Tube: I am using the art of ©Sandra Lusquin,
if you want to use her art you have to email her for permission.

Okay lets begin...

Open your template
CTRL + D to duplicate and close the original
Delete the copyright layer
Resize 91%

Delete the circle layer

Get your magic wand and select the top rectangle
Open your paper of choice, copy, close
New raster layer, paste into selection

Do the same with the rest of the rectangles.

For the frame and brush layers
Select all, float defloat
New raster layer
Fill with silver pattern
Delete your template layer

Now for your squares
Do the same as above but picking different papers
Also repeat the steps above for the frames

Turn your wordart black using the following settings for hue/sat/lue


Add drop shadows to your frame layers 2, 2, 30, 2 black

Add your tubes, erasing the parts of the images outside the boxes

Add some elements, merge visible and your done.

Don't forget your copyright :-)


Saturday, August 8, 2009

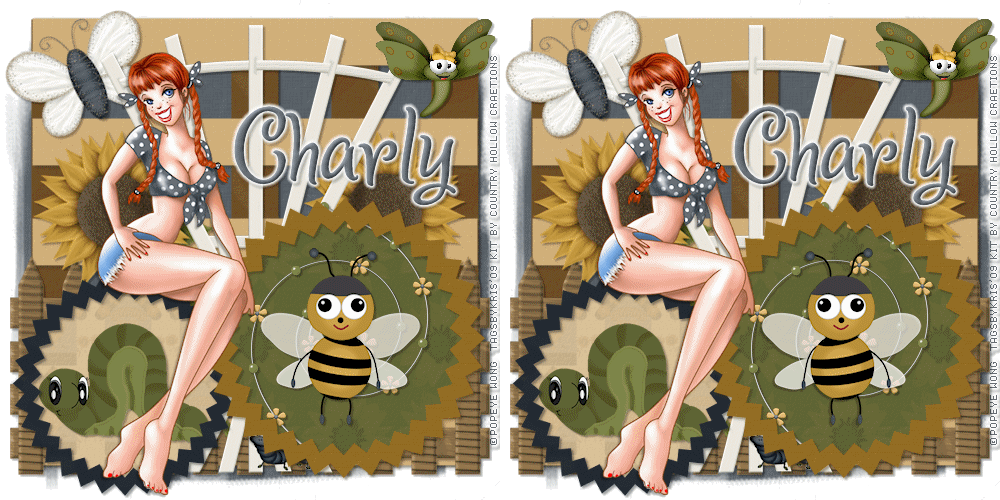
Country Boogie Tutorial


SUPPLIES:

Scrapkit: Splash of Sunflowers by Country Hollow Creations

Template: Template51 by Simply Devilish Scrapz

Tube: FTU Popeye Wong
My colorized version HERE

OK lets begin...

First we need to prepare our tube

Popeye Wong is one of my favorite artist because he allows us to not only use his wonderful work for free but color alter to fit our needed. On this tutorial, we'll be coloring her clothes to match our kit.

Open your tube. I'm using Orange-Juice
Take your magic wand with the following settings and select the red parts of your tube (her clothes)
I find it easier just to duplicate your tube and select the general area with your lasso tool and then delete the part that shouldn't be colored but you can do this however you feel the most comfortable.

Of course, if your just feeling lazy and don't wanna do this, you can use the tube in my supplies already colorized.

Colorize

Image and video hosting by TinyPic

Manual Color correction

Image and video hosting by TinyPic

OK now that we're done with that minimize your tube
Open up your template
CTRL+D to duplicate
Close the original
Delete the copyright layer
Open paper 8
Copy and close
Select the stripe layer
Select all - float- defloat
New raster layer
Paste into selection
Delete the template layer

Do the same with the other layers using papers of choice

Add your elements as you wish. See my tag for placements

I deleted the top circle but you can leave it if you choose to do so

Apply your mask if desired

Add your copyright and text
Copy merged

Open animation shop and paste as new animation

Go back to psp, select your bee layer and duplicate
Mirror and move it on top of the other bee
Delete the other be and copy merged

Go back to animation shop
Paste after the current frame
Ctrl + A
Alt + enter
Change it to about 35

Save and your done.

Wednesday, August 5, 2009

Hug A Bug Tutorial


SUPPLIES
Template: Template 8 by Simply Tami Designs

Artist © PinupToons.
In order to use the image in this tutorial you MUST purchase it from CILM

Scrapkit: Cute as a Bug by As Sweet As Honey Scraps

Mask: WSL_Mask245

Okay lets begin...

Open your template
CTRL+D to duplicate
Close your original
Delete the copyright layer

Select the bottom rectangles layer
Open paper 10 and paper 5
Copy paper 10 and go back to your template
Get your magic wand and select the inside of the bottom rectangle
New raster layer
Paste into selection
Select none.
Now select the outside frame of the bottom rectangle
Open paper 5 and copy
New raster layer, paste into selection

Do the same for the other rectangles using the following papers.
Rectangle 1 = Paper 5 and Paper 6
Rectangle 2 = Paper 7 and Paper 10
Rectangle 3 = Paper 6 and Paper 7
drop shadow = 2, 2, 30, 2, black
bottom heart = paper 8
top heart = paper 1
heart frame = paper 10

drop shadow = 2, 2, 30, 2, black

insert your tube

drop shadow = 3, 3, 40, 2, black

Open flower 3
resize 30%
Paste as new layer

Open bow 5
resize 25%
Paste as new layer

Open stamp
Resize 30%
free rotate 15% right
Paste as new layer

Open flair 1
Resize 25%
Copy and paste as new layer

Add copyright and text and your done.


Saturday, August 1, 2009

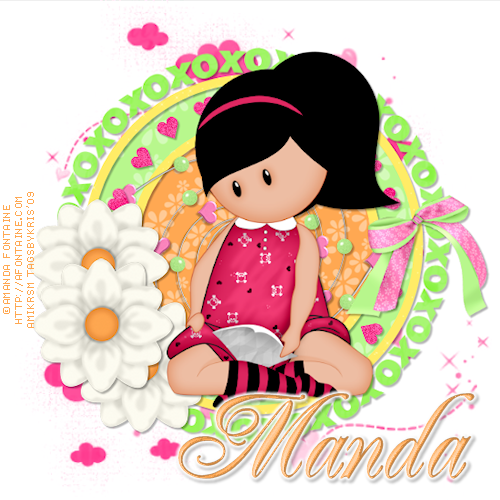
Kisses and Hugs Tutorial


SUPPLIES:

SCRAPKIT: Little Mess by Manda'z Dazzling Dezignz

TUBE: Artist © Amanda Fontaine
Her art is no longer available but I purchased it from AMI

Okay lets begin

Open your mask and minimate it

Open your template
Ctrl+D to duplicate
Close your original

Open paper 5
Copy and paste as new layer
Layers - arrange - send to bottom
Apply your mask
Merge group
Resize if desired

Activate raster 3 layer
Select all, float, defloat
New raster layer
Open paper 4
Copy and close
Edit - paste into selection
Select none
Delete your raster 3 layer

Activate raster 4 layer
Select all, float, defloat
New raster layer
Open paper 3
Copy and close
Edit - paste into selection
Select none
Delete your raster 4 layer

Activate raster 5 layer
Select all, float, defloat
New raster layer
Open paper 18
Copy and close
Edit - paste into selection
Select none
Delete your raster 5 layer

Activate raster 2 layer
Select all, float, defloat
New raster layer
Open paper 18
Copy and close
Edit - paste into selection
Select none
Delete your raster 2 layer

Activate merged layer
Select all, float, defloat
New raster layer
Open paper 5
Copy and close
Edit - paste into selection
Select none
Delete your merged layer

Activate promoted selection layer
Select all, float, defloat
New raster layer
Open paper 8
Copy and close
Edit - paste into selection
Select none
Delete your promoted selection layer

Add your tube
Resize as needed

Add your flowers
I resized by 20%

Add drop shadows to all your layers
Merge visible

Add any other elements, word art, etc

Don't forget your copyrights :-)

Thanks for giving my tutorial a shot.

I'd love to see your results :-)


Saturday, July 25, 2009

Loving You Always Tutorial


SUPPLIES

SCRAPKIT: Dancing Queen by KnC Scrapz

Artist © Keith Garvey.
In order to use the image in this tutorial you MUST purchase it from MPT

TEMPLATE: Template 3 by Peachy Keen Designs

PLUGINS: (optional) Xenofex 2 - Constellation

TUTORIAL:

Lets begin.

Open your tag template
CTRL+D
Delete your copyright layer

Delete the Flourishes layer

Go to your square layer
Open paper 10
Copy, paste as new layer
Select the tag background layer again
Select all - float - defloat
Select paper layer
Invert and delete
delete the original image layer

Do the same for the following layers

square frame = paper 1
hearts - paper 9
heart frame - paper 1

Select your text and free rotate left 90%

Open glittergangle
Resize 35%
Copy and paste as new layer
Place in the frame

Open music notes
Resize 50%
Copy and paste as new layer
Send to the bottom
Resize again by 50%
Duplicate and see my tag for placements
Add noise to each about 80

Open slippers 2 and resize 8%
Copy and paste
Move on top of the middle heart

Do the same with slipper 2 but move to the right
and the piano on the right 15% resized

Apply drop shadow to the hearts frames
Merge down the frame and hearts
Move your hearts downward to the edge of your brown frame
See my tag for placement

Resize drapes by 50% and place on the back square frame
Open the sunflowers
Resize by 15%
Place on top of the hearts
See my tag for placement

Open bow 2
Resize 15%
Place on the right corner of the drapes

Open butterfly 2
Resize 15%
See my tag for placement

Add your copyright and text

Close off your notes layer, square, and glitter dangle
Apply drop shadows
Merge visible

Merge down your two bottom layers (musical notes & bg)
Select your middle layer (glitter dangle)
Select all - float - defloat
Merge visible
Duplicate x2
Get your lasso tool and press CTRL while circling the part you don't want to glitter (the tube part)
Noise - 50 1st layer
Noise 47 2nd layer
Noise 44 3rd layer

If you're using the same tube as me
Get your magic wand and select the silver on your tube
Xenofex 2 - Constellation
http://i30.tinypic.com/25swyed.jpg
Use random each time

Save as pspanimation and open up animation shop

Save as GIF and your done.

Friday, July 24, 2009

Learning is a Treasure Tutorial


SUPPLIES

TEMPLATE: Template #1 by Scraps by CWD

SCRAPKIT: Welcome Spring by Country Hollow Creations

Artist © Daniel Esparza.
In order to use the image in this tutorial you MUST purchase it from CILM

WORDART: By me: HERE

PLUGINS: Toadies - Where are you

TUTORIAL:

Okay lets begin.

Open your template
CTRL+D to duplicate
Delete copyright information layer

Go to your tag background layer
Open paper 9
Copy, paste as new layer
Select the tag background layer again
Select all - float - defloat
Select paper layer
Invert and delete
delete the original image layer

Do the same for the following layers

dotted lines - paper 7
circle - paper 4
circle frame - paper 3
rectangle frame and rectangle - delete
mid square - paper 12
mid square frame - paper 3
left square - paper 11
right square - paper 910
right square frame - paper 9
left square frame - paper 2

Open your tube of choice
copy and paste as new layer
Move under the desired frame
Erase the parts on the outside of the frames
Repeat for the other two frames

Open string flower
Resize by 15%
Copy and paste as new layer
See my tag for placement
Do this again but move it to the other frame

Open daffodil resize 27%
See my tag for placement

Insert your wordart
Add your copyright and text

Close off your circle layer and white bg layer
Merge visible
Open up your closed layers
Select circle layer
Select all - float - defloat
merge down
Duplicate x3
Toadies - Where are you - ok
Repeat - change the overdose higher
Repeat - change the overdose even higher

Duplicate your type layer x2
Move one layer on top of the bg layer and merge down
repeat for your other layers
Save as a pspanimation

Open up animation shop
your speed should be about 30
save as a gif and your done


Monday, July 20, 2009

Tattoo Tutorial


SUPPLIES

TEMPLATE: SC Designz Scraps Template 2

SCRAPKIT: Pink Grapes by Dorthi Designs

Artist © Keith Garvey.
In order to use the image in this tutorial you MUST purchase it from MPT

Okay lets begin
Open your template up in PSP
CTRL+D to duplicate
Resize by 71%

Select your bottom layer
Open Paper1_Dorthi
Copy and paste as new layer
Select your bottom layer
Select all - float- defloat
Select your paper layer
Invert and delete

For the next layer we're going to delete those dots
Open frame11_Dorthi
Resize 64%
Copy and paste as new layer
You may have to adjust so that it's even on your tag

Select the next layer up which is Raster 2
Open Paper20_Dorthi
Copy and paste as new layer
Select all - float- defloat
Select your paper layer
Invert and delete

Repeat this on the other white squares also.

Next select papers for the inside of your frames
Repeat the steps above for each of the gray squares

Leave your staple layers alone

Next is your stars layer
Open a button of choice and two flowers
Resize them by about 10%
Copy and paste as new layers
Arrange them on top of the stars then delete the star layer

Next open your flower band
Resize it by about 25%
Copy and paste as new layer
Rotate by 90%
Place it over the left brackets
Image - duplicate
Image - mirror
Place over the right bracket
Delete the bracket layer

Open your tube of choice
I'm using the fabulous work of Keith Garvey
Copy and paste your tube as a new layer
Position your tube in the frame and then select the smaller paper layer
Select all - float - defloat - invert
Get your eraser tool and erase the bottom part of the tube
Just the part outside of the frame

Do the same with the same tube but enlarge the tube by 120%
Make sure to focus on different parts of the tube for the other frames

Add a few more elements and your drop shadows

Merge visable, add your copyright info and your text &

Your done :-)

Wednesday, July 15, 2009

I ♥ Strawberries Tutorial

Image and video hosting by TinyPic

SUPPLIES:

TEMPLATE: Tag Template #9 by Bel Vidotti

TUBE: Artist © Amanda Fontaine
Her art is no longer available but I purchased it from AMI

SCRAPKIT: Strawberry Patch by Cazie

MASK: Zuzzanna

This tutorial will be quick and easy and pretty self explanatory.

Open your template up
Resize by 500 on your largest side
Delete your copyright layer

Chose your papers of choice

copy and paste your papers on top of the templates
Select the template layer and select all, float and defloat.
Select paper layer, invert and delete.
Do this for all layers

I added noise of about 50 to my bottom layer.

Apply your mask of choice.
I'm using Zuzanna which can be found at the link listed above.
Merge group and then lower your opacity to about 50%

Add your elements, tube, wordart, copyright and text and your done.

Saturday, June 27, 2009

Beauty is Love

Image and video hosting by TinyPic

Image and video hosting by TinyPic

This fabulous kit is called Citrus Fresca from WackyWinnie Designz. You can purchase it at Country Hollow Scraps.

Tuesday, April 28, 2009

Friday, April 17, 2009

Luv U


Scrap kit from Baby Cakes Scraps

Artist © PinupToons.
In order to use the image in this tutorial you MUST purchase it from CILM

MASK: Of Choice

New image 500 x 500 pixels

new raster layer, open your paper twelve and copy and paste as new layer

Layers - add mask layer - WSL-Mask258 - Layers-merge-group

Open your bcs wrapped frame one and two, resize by 35% and copy and paste as new layers on your image

Please see my tag for placement

Select the insides of the frames and expand by 6, invert

Open paper 7, copy and paste as new layer and press delete

Move the paper layer behind the frames

Open bcs silver branch and place them behind the frames, see my tag for reference

Duplicate, flip and mirror

Open your tube of choice

copy and paste as new layer

Move your tube underneath the white frame and duplicate your tube layer

Effects, photo effects, black and white film

Suggest best color

Click on your other tube layer and colorize (0, 255)

ERase the part on the outside of your frames on both layers and all but the red lips on your tube on the red layer

Duplicate, mirror and adjust in the other frame

Open bcs blossom, resize 50% and paste as new layer

move to the bottom layer, right on top of the white background layer.

Apply mosaic glass and colorize the same as we did above.

Now add your main tube, elements, wordart and text to your liking :)

Friday, April 10, 2009

Wedding Night


This beautiful kit is called Wedding Day by Sirena Mala. You can purchase this kit and many other fabulous kits from Country Hollow Store. Click on the QuickPage to download the png version.