Showing posts with label Dani. Show all posts

Tuesday, November 9, 2010

Candycane


ARTIST: Artwork © Keith Garvey.
In order to use the image in this tutorial you MUST purchase it from MPT

SCRAPKIT: Berry Christmas by Scraps by Danielle

TEMPLATE: Template_125_Beth_09

FONT: Jacoba

Okay lets begin

Open your template
CTRL-D to duplicate
Close the original
Delete the copyright layer

Select your bottom layer
Open your paper of choice
Edit - copy
Close the paper
Select all, float, defloat
New raster layer
Paste into selection
Delete the original layer

do the same with the rest of the layers.

The elements I used for tag are listed below
Resize them appropriately, usually about 50%
Just Copy and paste them as a new layer
See my tag for placement
Add drop shadows

Snow Flake 4
Ornament 3
Candy Cane 1
Christmas Tree 1
Ornament 1
Ornaminent 2

Add your tube
Add your copyright and text
Merge visible and your done

Sunday, August 29, 2010

Girly Girl


ARTIST: Artwork © Keith Garvey.
In order to use the image in this tutorial you MUST purchase a membership from MPT

SCRAPKIT: Girly Girl by Scraps by Danielle

MASK: of choice.

Okay lets begin

New image 600 x 600

Open paper for mask
Copy and close
New raster layer
Select all
Paste into selection
Apply your mask
Merge group

Open frame
Resize as needed
Copy and close
Paste as new layer

Add your tube

The elements I used for tag are listed below
Resize them appropriately, usually about 50%
Just Copy and paste them as a new layer
See my tag for placement
Add drop shadows

Butterfly 2
Button Bow 1
Flower Decoration 2

When you are done
Add your copyright and text
Merge visible and your done

Butterfly Love


ARTIST: Artwork © DudleysBearDen.
In order to use the image in this tutorial you MUST purchase a membership from DudleysBearDen

SCRAPKIT: Butterfly Love by Scraps by Danielle

TEMPLATE: MC_Template47

Okay lets begin

Open your template
CTRL-D to duplicate
Close the original
Delete the copyright layer

Select your bottom layer
Open your paper of choice
Edit - copy
Close the paper
Select all, float, defloat
New raster layer
Paste into selection
Delete the original layer

do the same with the rest of the layers.

The elements I used for tag are listed below
Resize them appropriately, usually about 50%
Just Copy and paste them as a new layer
See my tag for placement
Add drop shadows

Buttefly 1
Gerber Daisy 1
Gerber Daisy 2
Decoration Flower 1

Add your tube
Add your copyright and text
Merge visible and your done

Wednesday, April 7, 2010

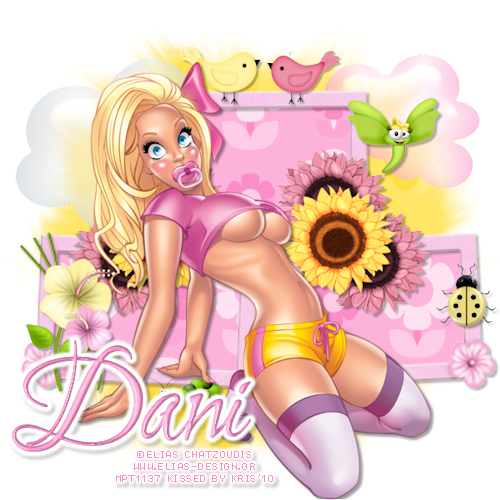
Secret Garden


ARTWORK: Artist © Elias Chatzoudis
In order to use the image in this tutorial you MUST purchase it from MPT

SCRAPKIT: Secret Garden by Dani of Dazzling Scraps

MASK: WSL_Mask241

Okay lets begin

New image 600 x 600

Open Paper 11
Copy and close
New raster layer
Select all
Paste into selection
Apply your mask
Merge group

Open Frame wtih Flowers in Center 2
Copy and close
Paste as new layer
Resize by 175%
Get your magic wand and select the inside of the frame
Expand by 5
Open Paper 7
Copy and close
Paste into selection

The elements I used for tag are listed below
Resize them appropriately, usually about 50%
Just Copy and paste them as a new layer
See my tag for placement
Add drop shadows

Bird 2
Bird 4
Cloud 1
Cloud 2
Dragonfly 2
Earth Worm 3
Sunflower 1
Sunflower 2
Gerber Daisy 2
Gerber Daisy 3
Lady Bug 1

Add your tube
Add your copyright and text
Merge visible and your done

Saturday, February 13, 2010

I Love Mardi Gras


ARTWORK: Artist © Elias Chatzoudis
In order to use the image in this tutorial you MUST purchase it from MPT

SCRAPKIT: Laissez Les Bon Temp Roulez by Dani of Dazzling Scraps

TEMPLATE: HERE

MASK: Of choice
Open your template
Shift + D to duplicate
Close the original
delete the copyright layer

Activate your dots layer
Select all
Float
Defloat
New raster layer
Fill with #00e60c
Delete your template layer
Add gradient glow and drop shadow

Activate your large rectangle layer
Select all
Float
Defloat
New raster layer
Fill with #690380
Delete your template layer
Add drop shadow

Activate your frame layer
Select all
Float
Defloat
New raster layer
Fill with #ffe011
Delete your template layer
Add drop shadow

Activate your small square layer
Select all
Float
Defloat
New raster layer
Fill with #00e60c
Delete your template layer
Add drop shadow

Activate your heart layer
Select all
Float
Defloat
New raster layer
Fill with #ffe011
Delete your template layer
Add a light texture to yoru heart
Add gradient glow and drop shadow

Activate your ribbon layer
Select all
Float
Defloat
New raster layer
Fill with #00e60c
Delete your template layer
Add a light texture to your ribbon
Free rotate left 5%
Add gradient glow and drop shadow

Add your tube
See my tag for placement
Erase the part below the green box
Add drop shadow

Open comedy mask1
Resize by 40%
Copy and close
Paste as new layer
Free rotate right 5%
Add drop shadow
See my tag for placement


Open tradgedy mask 3
Resize by 25%
Copy and close
Paste as new layer
Free rotate left 6%
Add drop shadow
See my tag for placement

Open mask with streamer 1
Resize by 60%
Copy and close
Paste as new layer
Free rotate 15% left

Tuesday, January 5, 2010

All You Need Is Love


ARTWORK: Artist © Elias Chatzoudis
In order to use the image in this tutorial you MUST purchase it from MPT

SCRAPKIT: All You Need Is Love by Dani of Dazzling Scraps

TUTORIAL: HERE

Thursday, December 24, 2009

Blue X-Mas


ARTWORK: Artist © Elias Chatzoudis
In order to use the image in this tutorial you MUST purchase it from MPT

SCRAPKIT: Blue Christmas by Dani

TUTORIAL: HERE

Sunday, November 15, 2009

Bright Me Out


ARTIST: Artwork © Jose A Cano.
In order to use the image in this tutorial you MUST purchase it from MPT

SCRAPKIT: Bright Me Out by Dani

TUTORIAL: HERE

Monday, November 9, 2009

For Santa


ARTIST: Artwork © Keith Garvey.
In order to use the image in this tutorial you MUST purchase it from MPT

SCRAPKIT: When Christmas Comes to Town by Dani

TUTORIAL: HERE


Saturday, November 7, 2009

Let it Snow


ARTIST: Artwork © Ismael Rac.
In order to use the image in this tutorial you MUST purchase it from AMI

SCRAPKIT: Let it Snow by Dani

Template: #75 by Dezigns by Ali

PLUGIN: Eye Candy - Gradient Glow

TUTORIAL: HERE


Tuesday, October 6, 2009

Purplex


Artist © Elias Chatzoudis.
In order to use the image in this tutorial you MUST purchase it from MPT

SCRAPKIT: Purplex by Dani

MASK: Of choice.

New image 600 x 500

Open paper 14
Copy and close
Select all
New raster layer
Paste into selection
Apply your mask of choice
Layers - merge - merge group

Open frame 1 with flower
Resize by 23%
Image - rotate right
Copy and close
Paste as new layer

Get your magic wand and select the inside of the frame
Expand by 6
Open paper 13
Copy and close
New raster layer
Paste into selection
Move layer beneath your frame

Open your tube
Resize by 93%
Copy and close
Paste as new layer

Open rose coursage 3
Resize by 7%
Copy and close
Paste as new layer
See my tag for placement

Add your other elements as desired

Add drop shadows to all your layers
2, 2, 40, 3, black

Add your coypright and text
Merge visible and your done :-)
Friday, October 2, 2009

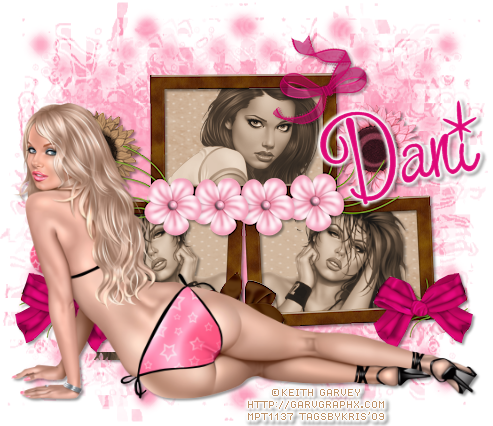
Pink Chocolate


SCRAPKIT: Pink Chocolate by Dani

Artist © Keith Garvey.
In order to use the image in this tutorial you MUST purchase it from MPT

MASK: Of choice

New image 500 x 500
Open paper of choice
Copy and Close
Paste as new layer
Apply your mask of choice

Open your frame
Copy and close
Paste as new layer

Take your magic wand and select the inside of the frame
Expand by 6
New raster layer
Open Paper of choice
Copy and close
Paste into selection

Open your tubes
Get your square selection tool
Copy the head shots
Paste as new layer
Effects - photo effects - sepia - default settings
Do the same for all three

Open your big tube
Copy and close
Paste as new layer

Open your elements
Copy and close
Paste as new layer
Resize as needed

Add drop shadows to all your layers
3, 3, 30, 3, black

Add your copyright and text
Merge visible and your done. :-)

Saturday, September 26, 2009

ChocoMint


Artist © Suzanne Woolcott AKA Gorjuss.
In order to use the image in this tutorial you MUST purchase it from her site

SCRAPKIT: ChocoMint by Dani

MASK: Of choice

New Image 600px × 450px

Open Paper of choice
Copy and paste as new layer
Apply your mask of choice

Open your frame of choice
Resize as needed, about 120%
Copy and paste as new layer
Sharpen

Get your magic wand and select the inside of the frame
Expand by 6
Open your paper of choice
Copy and close
New raster layer
Paste into selection
Move layer beneath the frame

Open your bow of choice
Copy and paste as new layer

Add drop shadows to all your layers
3, 3, 30, 3, black

Add your tube
Resize as needed.

Add the rest of your elements
Don't forget your drop shadows

Add your text and copyright
Merge visible and your done :-)


Sunday, September 20, 2009

Battlefield


Artist © Michael Landefeld.
In order to use the image in this tutorial you MUST purchase it from CILM

SCRAPKIT: Love is a Battlefield by Dani

MASK: Of Choice

WORDART MADE BY ME: HERE

Open a pink paper
Copy and paste as new layer
Apply your mask of choice

Open your pink frame
Resize it with the largest side being 450 pixels
Copy and paste as new layer

Open your wordart
Place it above your heart

Open your flowers
Resize them with 125 px being the longest side
Copy and paste them as new layers
See my tag for placement

Open your tube
Place it in the center

Add drop shadows, copyright info and text

You're done!

Tuesday, September 8, 2009

Free Broom Rides


Artist © Elias Chatzoudis.
In order to use the image in this tutorial you MUST purchase it from MPT

SCRAPKIT: Spookyville by Dani

TEMPLATE: Halloween Template 2 by Ali

Okay lets begin...

Open your template
CTRL+D to duplicate
Close your original
Delete your copyright information

Select the bottom layer
Open paper of choice, copy and close
Select all float, defloat
New raster layer
Paste into selection

Do the same for the rest of the layers.

Add your elements, tube, and copyright information

Apply your gradient glows (white and/or yellow) and/or drop shadows

Add your text

Open your spider and add him as a new layer
Get your pen tool, closing the bg
Draw a straight black line from your broom to your spider
copy merged
Open up Animation Shop
Paste as new animation

Go back to PSP and move your spider up some
Copy merged, paste after current frame

Repeat the step and repeat again but this time

Save as a GIF and your done.

Wednesday, September 2, 2009

Cherrybomb


TEMPLATE: #78 by Melissaz Creationz

SCRAPKIT: Infinity Kit by Dani

TUBE: Artist © Keith Garvey.
In order to use the image in this tutorial you MUST purchase it from MPT

Okay lets begin...

Open your template
CTRL+D to duplicate
Close your original
Delete your copyright information

Select the bottom layer
Open paper of choice, copy and close
Select all float, defloat
New raster layer
Paste into selection

Do the same for the rest of the layers.

I adjusted my wording and flipped the stars to match.

Apply gradient glow and drop shadows to your layers
Add your tube, resize if desired
Duplicate and place behind the frame
Source (L) for the blend mode
Duplicate - mirror - place behind the other frame
Delete any that is outside the frame.
Add elements and add drop shadows to them

Add your text and copyright and your done.

Tuesday, September 1, 2009

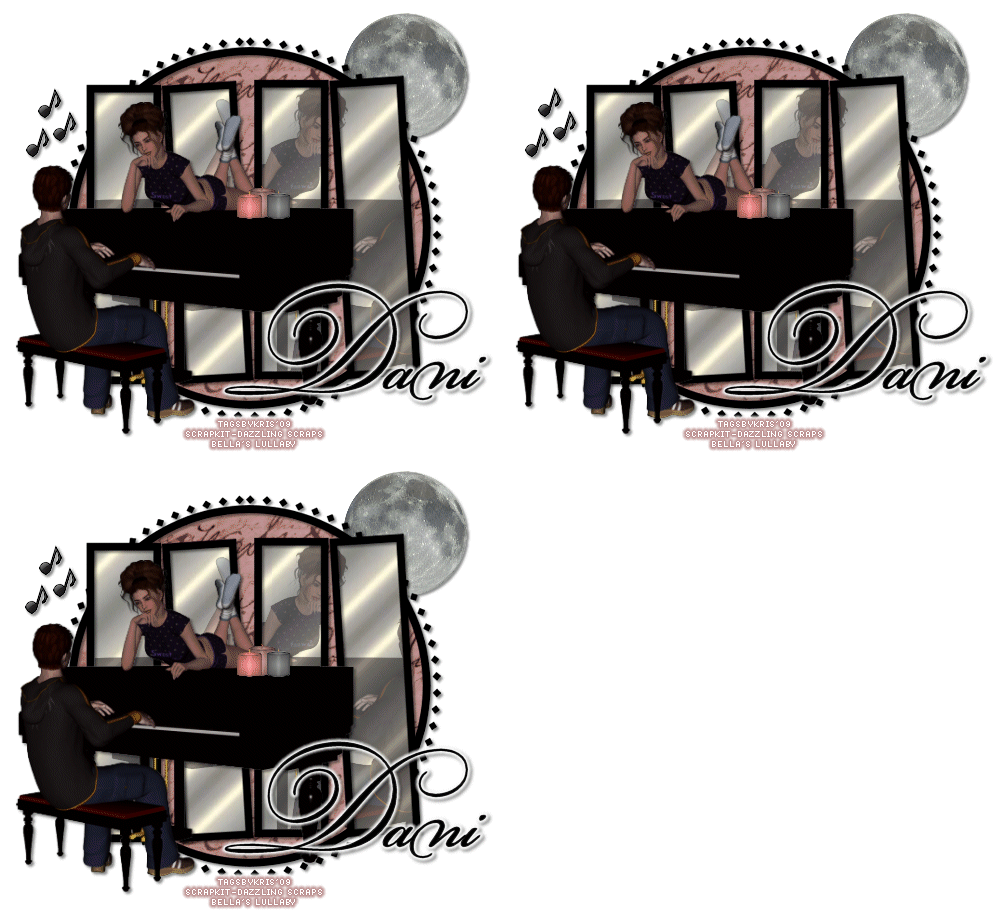
Bella's Lullaby


TEMPLATE: #14 by Lacarolita's Designz

SCRAPKIT: Bella's Lullaby Kit by Dani

Musical note: Any musical note will do.

Silver Pattern: HERE

Okay lets begin...

Open your template
CTRL+D to duplicate
Close your original
Delete your copyright information
Delete the side brackets also

Select your bottom layer which is the diamonds around the circle
hue/sat/light to turn it black
hue: 0, sat: 0, lightness: -100

Repeat these steps for the frames for the circle & rectangles

Open paper 2, copy and close
Select the circle layer
Select all, float, defloat
Paste into selection

Open your silver fill and do the same for the rectangles using it

Paste your tube
Duplicate, mirror
Lower opacity to 50%

Select the rectangle layer
Select all, float, defloat, invert
Select the mirrored tube layer
Hit the delete key
Merge this layer down with your rectangle layer

Add drop shadows to all your layers
3, 3, 30, 3, black

Add some elements
Merge visable

Now open your musical note
Resize by 5%
Copy and paste as new layer
Place it on the side, duplicate x2
Move them so they are not on top of each other

If you do not wish to animate them, add text, copyright, merge - flatten and your done.

For animation
Add your text and copyright info
Copy merged
Open animation shop
Paste as new animation
Go back to PSP
Select one of the note layers
press the arrow key either up or down once
Do the same for the other, but make them random like they are dancing
After your done, copy merge, paste after current frame

Repeat this step two more times
When your done save your file.

Thanks for trying my tuturial. I'd love to see your results!

Thursday, July 23, 2009

Fae Love tutorial


SUPPLIES

TEMPLATE: Template59 by Yvette

SCRAPKIT: Rocker Girl by Dani

Artist © Joel Adams.
In order to use the image in this tutorial you MUST purchase it from CILM

PLUGINS:
Lokas Aqua or Eye Candy Glass
Richard Rosenman - Scanlines

Okay lets begin

Open your template
Shift+D to duplicate, close original
Delete your copyright layer

Select words layer
Open paper 8
Copy, paste as new layer
Select words layer
Select all - float - defloat
Select paper layer
Invert and delete.

Little hearts - black
dotted heart - black
heart - paper 7

Canvas size with the following settings

Add your tube of choice

Open your three hearts
Resize by 20%
Place on top of the black hearts

Open your purple and pink gerber daisy
Resize 50%
Place behind your tube
Duplicate the purple x2 and pink x2
Place them according to my tag

Open double bow 2
Resize by 30%
Copy and paste as new layer

Apply Lokas Aqua to your black hearts
You can also make it glassy with Eye Candy Glass

Close off your background layer
Merge visible
Duplicate your tag
Gaussian Blur 10
Richard Rosenman - Scanlines
Default settings

Merge visible
Add copyright and text


Friday, July 17, 2009

Things I Love Tutorial

Image and video hosting by TinyPic

SUPPLIES

Tag Template: Bel Vidotti

ScrapKit: Things I love by Dani

Artist © Joel Adams.
In order to use the image in this tutorial you MUST purchase it from CILM

Open tag template and CTRL D to duplicate
Delete copyright layer
Resize with your largest side being 500 pixels

Start at your bottom layer and pick a paper of choice
Open your paper and copy
Go to your template paste as new layer
Select your cloud layer
Select all, float and defloat
Invert and delete

Do the same for the rest of the layers

After you get to your LOVE layer
Duplicate it and select the bottom layer
Go to Adjust, blur, motion blur
Use the following settings.

Image and video hosting by TinyPic

Duplicate your blur layer and then merge down
Do this about 5 times
Adjust - hue/saturation/lightness
Use the following settings.

Image and video hosting by TinyPic

Repeat these steps to the larger heart
Move the heart layer on top of the back cloud

Repeat the above steps for the background cloud layer also

Open your tube of choice
I'm using one of my older favorites from Joel Adams.
Copy and paste as new layer
Position your tube over the wordart

I merged my top pink heart layer, and the green layer &
lowered the opacity to 70% but this is optional.

Open your flowers and copy and paste as new layers
Position them on top of your blue cloud layer
See my tag for placement

Now add your elements of choice

Merge visible

Add your copyright and text and your done.


Monday, May 25, 2009

Love Exists


SUPPLIES NEEDED
Kit of choice I'm using #1 Mom by Dani
TUBE: Artist © Amanda Fontaine
Her art is no longer available but I purchased it from AMI

Mask of choice
Font of choice


New Image 500 x 500 transparent

Open heart frame 1, resize by 90%

Copy and paste as new layer

Move to the top of your workspace and then duplicate, flip
Layers- merge - merge down
Duplicate, free rotate 90%
Layers- merge - merge down
Resize by 80%

Open Paper 7
Resize 60%, copy and paste new layer
Move layer behind the hearts
Apply your mask of choice
I used heart mask from Zuzzanna

Open Paper 16
Resize by 50%, copy and paste new layer
Resize by 70% again (make sure all layers is not checked)
Image free rotate 65%

Open Paper 9
Resize by 50%, copy and paste new layer
Resize by 70% again (make sure all layers is not checked)

Open Paper 1
Resize by 50%, copy and paste new layer
Resize by 70% again (make sure all layers is not checked)
Image free rotate 45%

Open your tube of choice
I'm using the fantastic work of Amanda Fontaine
You must purchase a license to use this artwork.
I resized by tube by 75%

Add your word art and any other elements of choice

and don't forget your drop shadows

I hope you enjoyed my tutorial. I would love to see your results. Please send them to calirose.love@gmail.com