SUPPLIES:
Artist © Jennifer Janesko.
In order to use the image in this tutorial you MUST purchase it from CILM
SCRAPKIT: Imagine by Rieneke Designs
MASK: WSL_Mask353 by Chelle
New image 500 x 500, white bg
Open paper 2
Copy and close
Paste as new layer
Apply your mask
Open frameflower1
Resize by 72%
Copy and close
Paste as new layer
Open your tube
Copy and paste
Delete the part outside of the frame, except the hair
Open gerbra's2
Resize by about 50% or so
Copy and paset as new layer
See my tag for placement
Place the rest of your elements to your liking
Add drop shadows to all your layers
2, 2, 40, 3, black
Add copyright and text
Add a gradient glow to both
Merge visible and your done. :-)

Artist © Elias Chatzoudis.
In order to use the image in this tutorial you MUST purchase it from MPT
SCRAPKIT: Purplex by Dani
MASK: Of choice.
New image 600 x 500
Open paper 14
Copy and close
Select all
New raster layer
Paste into selection
Apply your mask of choice
Layers - merge - merge group
Open frame 1 with flower
Resize by 23%
Image - rotate right
Copy and close
Paste as new layer
Get your magic wand and select the inside of the frame
Expand by 6
Open paper 13
Copy and close
New raster layer
Paste into selection
Move layer beneath your frame
Open your tube
Resize by 93%
Copy and close
Paste as new layer
Open rose coursage 3
Resize by 7%
Copy and close
Paste as new layer
See my tag for placement
Add your other elements as desired
Add drop shadows to all your layers
2, 2, 40, 3, black
Add your coypright and text
Merge visible and your done :-)

Artist © Suzanne Woolcott AKA Gorjuss.
In order to use the image in this tutorial you MUST purchase it from her site
SCRAPKIT: Harvest Twist by Country Hollow Scraps
MASK: Of choice
Open new image 600 x 500
Open Paper 4
Copy and close
Select all
New raster layer
Paste into selection
Apply your mask
Merge group
Open frame 1
Copy and close
Paste as new layer
Open paper 7
Copy and close
Get your magic wand and select the insides of the frame
Expand by 6
New raster layer
Paste into selection
Move beneath the frame
Apply your drop shadow to the frame
2, 2, 40, 3, black
Open your pumpkin3
Copy and paste as new layer
Apply drop shadow, same settings
Open your leaves
Place them behind your frame
Open the flowers
Resize them with the largest side 100 px
Copy and close
Paste as new layer
See my tag for placement
Open your tube
Copy and close
Paste as new layer
Apply drop shadows to all your layers
Add your copyright and text
Merge visible and your done :-)

Artist © Keith Garvey.
In order to use the image in this tutorial you MUST purchase it from MPT
SCRAPKIT: Cherry Chocolate by Bea's Creations
MASK: Of choice
New image 600 x 500
Open frame12
Copy and close
paste as new layer
Active your background layer
Open paper 9
Copy and close
New raster layer
Select all
Paste into selection
Apply your mask of choice
Active your frame layer
Get your magic wand and select the inside of the frames
Open paper 10
Copy and close
New raster layer
Paste into selection
Move that layer beneath your frame
Open your tube
Copy and paste as new layer
Take your square selection took and select parts of your tube
Paste as new layer and move beneath the frame
When you've done all four frames
Duplicate and go to image - photo - sepia
Zoom it by about 500x's
Get your eraser tool and erase the parts you want in color
Add your elements and drop shadows, 2, 2, 40, 3, black
Add your copyright and text
Merge visible and your done.

Artist © Elias Chatzoudis.
In order to use the image in this tutorial you MUST purchase it from MPT
SCRAPKIT: I Am Batty by Sticky Kisses Designs
MASK: Of choice.
New Image 500 x 500
Open frame 4
Resize 59%
Copy and close
Paste as new layer
Open your tube
Resize about 97%
Copy and close
Paste as new layer
Open paper 12
Copy and close
Select your background layer
Select all
New raster layer
Paste into selection
Apply your mask of choice
Merge group
Activate your tube layer
Open bat2
Resize by 28%
Copy and close
Paste as new layer
See my tag for placement
Activate the frame layer
Open the tree
Resize by 77%
Copy and close
Paste as new layer
Delete the bottom part sticking out of the frame
Activate tube layer
Open bow5
Resize by 75%
Copy and close
Paste as new layer
See my tag for placement
Activate your mask layer
Open your cloud
Resize by 44%
Copy and close
Paste as new layer
See my tag for placement
Activate your frame layer
Open flower 3
Resize by 23%
Copy and close
Paste as new layer
See my tag for placement
Duplicate and place the other one
Open flower1
Resize by 30%
Copy and close
Paste as new layer
See my tag for placement
Add drop shadows to all your layers except your mask
2, 2, 40, 3, black
Add your coypright and text
Merge visible and your done.

Artist © Elias Chatzoudis.
In order to use the image in this tutorial you MUST purchase it from MPT
SCRAPKIT: Schnegge's Collab Kit contribution
This can be found at Twilight Scraps.
MASK: Of choice
New Image 500 px x 500 px
Select all
Open paper of choice
Copy and close
Paste as new layer
Apply your mask of choice
Merge group
Open frame of choice
Copy and close
Paste as new layer
Get your magic wand
Select the inside of the frame
Expand by 6
New Raster layer
Open paper of choice
Copy and close
Paste into selection
Move layer beneath the frame
Open your tube
Copy and close
Paste as new layer
Duplicate tube layer
Resize by about 200%
Move beneath the frame
Lower opacity to 75%
Delete the part outside of the frame
Merge that layer down
Get your magic wand and select the inside of the frame again
Expand by 6
Apply the texture - canvas
default settings
Add tube and elements of choice
Add copyright and text
Add drop shadows to all layers except mask
Merge visible and your done.

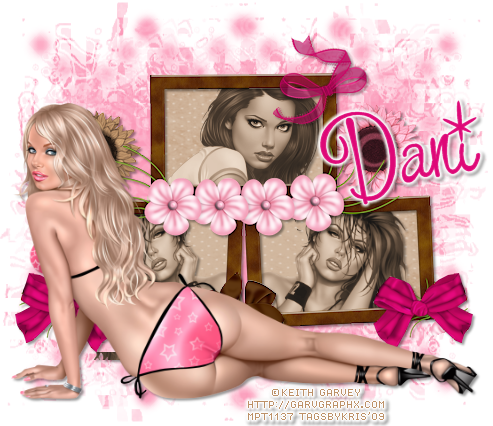
SCRAPKIT: Pink Chocolate by Dani
Artist © Keith Garvey.
In order to use the image in this tutorial you MUST purchase it from MPT
MASK: Of choice
New image 500 x 500
Open paper of choice
Copy and Close
Paste as new layer
Apply your mask of choice
Open your frame
Copy and close
Paste as new layer
Take your magic wand and select the inside of the frame
Expand by 6
New raster layer
Open Paper of choice
Copy and close
Paste into selection
Open your tubes
Get your square selection tool
Copy the head shots
Paste as new layer
Effects - photo effects - sepia - default settings
Do the same for all three
Open your big tube
Copy and close
Paste as new layer
Open your elements
Copy and close
Paste as new layer
Resize as needed
Add drop shadows to all your layers
3, 3, 30, 3, black
Add your copyright and text
Merge visible and your done. :-)