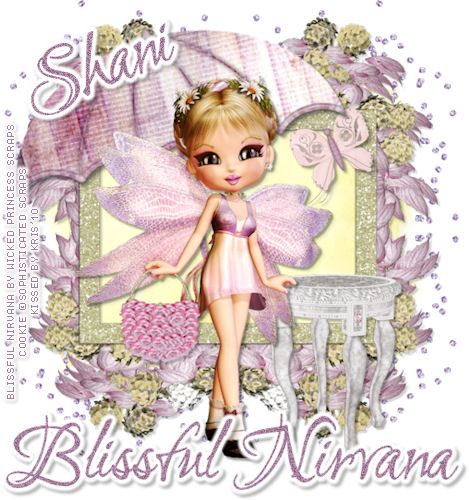
SCRAPKIT: Blissful Nirvana by Wicked Princess Scraps
MASK: WSL_Mask187
New image 600 x 600
Open WP_BN_PP21
Copy and close
New raster layer
Select all
Paste into selection
Apply your mask
Merge group
Open WP_IDL_STARSCATTER
Resize as needed
Copy and close
Paste as new layer
Open WP_BN_LEAFYSQUAREFRAME
Copy and close
Paste as new layer
The elements I used for tag are listed below
Resize them appropriately, usually about 50%
Just Copy and paste them as a new layer
See my tag for placement
Add drop shadows
WP_BN_UMBRELLA
WP_BN_TABLE
WP_BN_PURSE
WP_BN_PURPLEGLITTERSCATTER
WP_BN_NIRVANA
WP_BN_FANCYBUTTERFLY
Add a light drop shadow
When you are done
Add your copyright and text
Merge visible and your done

ARTWORK: Artist © Baron Von Lind
In order to use the image in this tutorial you MUST purchase it from MPT
SCRAPKIT: Steampunk by Gina of KiKeKa Kits
MASK: WSL_Mask12
Okay lets begin
New image 600 x 600
Open cbg_steampunk_paper08
Copy and close
New raster layer
Select all
Paste into selection
Apply your mask
Merge group
Open cbg_steampunk_frame06
Copy and close
Paste as new layer
The elements I used for tag are listed below
Resize them appropriately, usually about 50%
Just Copy and paste them as a new layer
See my tag for placement
Add drop shadows
cbg_steampunk_chair
cbg_steampunk_clock02
cbg_steampunk_bow01
cbg_steampunk_flower01
cbg_steampunk_branch01
cbg_steampunk_flower02
cbg_steampunk_bougainville02
cbg_steampunk_flower03
cbg_steampunk_brooch
Add your tube
Add your copyright and text
Merge visible and your done

SCRAPKIT: Spring Fairy by Soxsational Scraps
MASK: Of Choice
Okay lets begin
New image 600 x 600
Open your paper of choice
Copy and close
New raster layer
Select all
Paste into selection
Apply your mask
Merge group
Open your frame of choice
Copy and close
Paste as new layer
Add drop shadow
Pick out your elements and resize them appropriately, usually about 50%
Unfortunately, I've lost the names of the elements but you can look at my tag and see which ones I used
Just Copy and paste them as a new layer
See my tag for placement
Add drop shadows
Add your copyright and text
Merge visible and your done

You can get it HERE

SCRAPKIT: Denim and Daisy Tagger Kit by Nikki of Creative Intentionz
MASK: Of Choice
Okay lets begin
New image 600 x 600
Open CIZ-DenimAndDaisy-Paper6
Copy and close
New raster layer
Select all
Paste into selection
Apply your mask
Merge group
Open CIZ-DenimAndDaisy-FlowerFrame1
Copy and close
Paste as new layer
Add drop shadow
The elements I used for tag are listed below
Resize them appropriately, usually about 50%
Just Copy and paste them as a new layer
See my tag for placement
Add drop shadows
CIZ-DenimAndDaisy-Butterfly1
CIZ-DenimAndDaisy-Butterfly2
CIZ-DenimAndDaisy-CurledRibbon2
CIZ-DenimAndDaisy-Daisy2
CIZ-DenimAndDaisy-Daisy6
CIZ-DenimAndDaisy-Fae1
CIZ-DenimAndDaisy-LadyBug1
CIZ-DenimAndDaisy-LadyBug2
CIZ-DenimAndDaisy-LadyBug3
CIZ-DenimAndDaisy-LadyBug4
CIZ-DenimAndDaisy-LoopyBow2
Add your copyright and text
Merge visible and your done

ARTWORK: Artist © Elias Chatzoudis
In order to use the image in this tutorial you MUST purchase it from MPT
SCRAPKIT: Secret Garden by Dani of Dazzling Scraps
MASK: WSL_Mask241
Okay lets begin
New image 600 x 600
Open Paper 11
Copy and close
New raster layer
Select all
Paste into selection
Apply your mask
Merge group
Open Frame wtih Flowers in Center 2
Copy and close
Paste as new layer
Resize by 175%
Get your magic wand and select the inside of the frame
Expand by 5
Open Paper 7
Copy and close
Paste into selection
The elements I used for tag are listed below
Resize them appropriately, usually about 50%
Just Copy and paste them as a new layer
See my tag for placement
Add drop shadows
Bird 2
Bird 4
Cloud 1
Cloud 2
Dragonfly 2
Earth Worm 3
Sunflower 1
Sunflower 2
Gerber Daisy 2
Gerber Daisy 3
Lady Bug 1
Add your tube
Add your copyright and text
Merge visible and your done

ARTIST: Artwork © Dudleys Bear Den.
In order to use the image in this tutorial you MUST purchase it from Dudleys Bear Den
SCRAPKIT: Spring-A-Doodle by Nikki of Creative Intentionz
MASK: WSL_Mask125
Okay lets begin
New image 600 x 600
Open CIZ-SAD-Paper2
Copy and close
New raster layer
Select all
Paste into selection
Apply your mask
Merge group
Open CIZ-SpringADoodle-Frame2
Copy and close
Paste as new layer
Add drop shadow to your frame
The elements I used for tag are listed below
Resize them appropriately, usually about 50%
Just Copy and paste them as a new layer
See my tag for placement
Add drop shadows
CIZ-SpringADoodle-ScatteredFlowers1
CIZ-SpringADoodle-Mushroom2
CIZ-SpringADoodle-Tree2
CIZ-SpringADoodle-Bee
CIZ-SpringADoodle-Bird1
CIZ-SpringADoodle-Grass1
CIZ-SpringADoodle-Rainbow
CIZ-SpringADoodle-LadyBug2
CIZ-SpringADoodle-Sun
CIZ-SpringADoodle-Mushroom1
Add your tube
Add your copyright and text
Merge visible and your done

ARTIST: Artwork © PinupToons.
In order to use the image in this tutorial you MUST purchase it from CILM
SCRAPKIT: Luv Easter by Candy Treats
MASK: WSL_Mask349
Okay lets begin
New image 600 x 600
Open CandysTreats-LuvEaster1
Copy and close
New raster layer
Select all
Paste into selection
Apply your mask
Merge group
Open CandysTreats-LuvEastercluster2
Copy and close
Paste as new layer
Get your magic wand and select the inside of the yellow frame
Expand by 5
Open CandysTreats-LuvEasterplainblock1
Copy and close
Paste into selection
Select None
Repeat the steps on the red frame
This time use CandysTreats-LuvEaster7
Add drop shadow to your frame
The elements I used for tag are listed below
Resize them appropriately, usually about 50%
Just Copy and paste them as a new layer
See my tag for placement
Add drop shadows
CandysTreats-LuvEasterflower2
CandysTreats-Springword1
CandysTreats-heartframe2
CandysTreats-heartsmall2
CandysTreats-mushroom
Add your tube
Add your copyright and text
Merge visible and your done

ARTIST: Artwork © PinupToons.
In order to use the image in this tutorial you MUST purchase it from CILM
SCRAPKIT: Gracie by Joyfully Yours, Suzanna
MASK: WSL_Mask247
HEARTS ANIMATION: HERE
Okay lets being...
New Image 600 x 600
Open JYSW_Gracie_bkgrnd9
Copy and close
New raster layer
Select all
Paste into selection
Apply your mask
Merge group
Open JYSW_Gracie_frame1
Copy and close
Paste as new layer
Get your magic wand and select the inside of your frame
Expand by 4
New raster layer
Open JYSW_Gracie_bkgrnd6
Copy and close
Paste into selection
Move beneath your frame
Add a light drop shadow to your frame
The elements I used for tag are listed below
Resize them appropriately, usually about 50%
Just Copy and paste them as a new layer
See my tag for placement
Add drop shadows
JYSW_Gracie_Flower4
JYSW_Gracie_Flower3
JYSW_Gracie_glass_heart
JYSW_Gracie_ow
Add your tube
Add your copyright and text
When you are done add light drop shadows to all layers
Select your frame background layer
Select all - float -defloat
To add animation:
Open Animation Shop
Open your animation
Select the first frame
Copy
go back to PSP
Right click on your gray background (not the tag)
Paste as new image
select your paint bucket fill
Double click on your forground color
Go to the pattern tab
Find your heart image
Fill your frame background with this
Copy merged
Back to animation shop
Right click
Paste as new animation
Do these steps again with the 2nd frame
Only when you paste your tag, paste after current frame
Repeat these steps for all 16 frames of the hearts
When your done save as a GIF and your done.


