Saturday, October 31, 2009

Blue Spring


SCRAPKIT: Signs of Spring by Stacey's Designs

ARTIST: Artwork © Ismael Rac.
In order to use the image in this tutorial you MUST purchase it from AMI

TUTORIAL: HERE

To take advantage of this tag offer, please join my GROUP.

Thursday, October 29, 2009

Creme de Menthe


This tag is made from Gemini Creationz Creme de Menthe kit.

To take advantage of this tag offer, please join my GROUP.

Tuesday, October 27, 2009

Vampire Lust

Image and video hosting by TinyPic

This tag is made from Gemini Creationz Vampire Lust Kit.

To take advantage of this tag offer, please join my GROUP.

Sunday, October 25, 2009

Fall Feelings


Artist © Keith Garvey.
In order to use the image in this tutorial you MUST purchase it from MPT

SCRAPKIT: Fall Feelings by Stargazer Musings

MASK: Of choice

TUTORIAL: HERE

To take advantage of this tag offer, please join my GROUP.

Happy Halloween


This tag is made from Sticky Kisses Designs kit called Got Candy.

To take advantage of this tag offer, please join my GROUP.

Hope - BCA


ARTWORK: Artist © Elias Chatzoudis
In order to use the image in this tutorial you MUST purchase it from MPT

SCRAPKIT: Hope by Tiny Designs

TUTORIAL: Brewing, come back later plz. HERE
*Note: Her site is down so any kit can be used for this tutorial.

Monday, October 19, 2009

CU Christmas Teddies

http://i37.tinypic.com/2j29s2o.jpg
$1.50 CU OK

I have to manual process orders so please allow 12-24 hours for delivery.


Sunday, October 18, 2009

Puppy Luv

http://i37.tinypic.com/sf8dbs.png

This tag is made from Sticky Kisses Designs kit called Charlie.

To take advantage of this tag offer, please join my GROUP.

Winter


Image and video hosting by TinyPic

ARTWORK: ©Daniel Esparza
In order to use the image in this tutorial you MUST purchase it from CILM

SCRAPKIT: Midnight Winter by Dorthi's Designs

TUTORIAL HERE

Break the Silence

http://i35.tinypic.com/2ijgj83.png

This tag is made from Sticky Kisses Designs kit called Break the Silence.

To take advantage of this tag offer, please join my GROUP.

Saturday, October 17, 2009

Endless Love


ARTWORK: Artist © Elias Chatzoudis
In order to use the image in this tutorial you MUST purchase it from MPT

SCRAPKIT: Endless Love by Lisa aka Aleahs Mommy Designs

TEMPLATE: Designs by Ali

PHOTO: HERE

The tutorial can be found HERE

Thursday, October 15, 2009

Angel Among Us


SUPPLIES

SCRAPKIT: An Angel For Kayla by KnC Scrapz

Artist © PinupToons.
In order to use the image in this tutorial you MUST purchase it from CILM

The tutorial can be found HERE

Tuesday, October 13, 2009

CHS Designer and CT Call


We have 3 different contracts to choose from
75/25
Non Exclusive Designer,you may sell at other stores and may sell your products at other stores that you sell at CHS.
85/15
Your a Exclusive Designer to CHS
You can only sell at ChS and nowhere else
80/20
Your not a exclusive Designer to CHS,But the products you sell at Chs are to be exclusive you may sell in other stores but not the products you sell at CHS.

Lead Designer Call Also
For Lead Designer,It would contsist of reg Designer selling your products of course ,Also keeping Designer Blog Updated,with Designer Blinkies,News of the store,Sales going on Ect.
Choosing Designer Of The Month.setting up with them what they will do for there month,getting together with the DOTM to talk about what they will do for there month,Sale,Freebie or whatever,send out the ad about the dotm,post them on the Blog,Forum and such ,get ads together for when we have store wide sales ,send them out before the sale to ad groups,forums and places where they can be posted,we only have 5 store wide sales a yr so that should be easy,Help me set up special contests and such and help with ideas for them and such,interacting with the designer group,praising them on there new products,answering questions when you can,posting in our gallery leaving comments on our CTS layouts and such every few days,and just helping the owner out when needed,will get 20 voucher for anything in store Ont he first of the month for your help,and special surprises from me each month also.if interested email charly@countryhollowscraps.com with CHS lead desiger in subject line with alittle about yourself and where you sell if anyplace link toy our blog and if you have done anything like this before no prior experience needed though.
CT Call for CHS
Want to CT For a wonderful Store with Great Designers?
CHS is looking for some more CT members to add to our already wonderful team
Tut writers,Layout and Tag Makers wanted
Work with atleast 2 kits per month more if wanted
Post in 3 places
Make atleast 1-2 layouts and or tags per kit
Or if your a tut writer
Atleast one tutorial per kit
Blog about our store,AND our Store Designers and products as much as possible on your Blog.
If your interested
Please email getcreative@countryhollowscraps.com with chs CT call in subject line
Alittle about yourself
Your blog link and a few links to your best gallerys,names of cts your on now if any,
Newbies welcome you have to start somwhere right?how about at CHS?

Autumn Dreams


ARTWORK: Artist © Jose Cano.
In order to use the image in this tutorial you MUST purchase it from MPT

SCRAPKIT: Autumn Dreams by Bastelgalaxy

MASK: Of choice

Okay lets begin...

New image 600 x 550

Open paper 23
Copy and close
New raster layer
Select all
Paste into selection
Apply your mask

Open frame 4
Resize with your largest side 450 px
Copy and close
Paste as new layer

Adjust your mask so it fits exactly under your frame

Next step will go for all your elements.

Open your element
Resize with the largest between 250-300 px
Copy and close
Paste as new layer
See my tag for placement

Open your tube
Copy and close
Paste as new layer
Duplicate the layer and drag it beneath the frame
Select the top tube layer and delete the bottom part touching the frame
Add drop shadow to your BOTTOM layer

Add your text and copyright
Merge visible and your done. :-)

Drop Shadow 2, 2, 30, 3, black

Font used: Sweetheart Script

Frozen in Time


ARTWORK: © Myka Jelina
In order to use the image in this tutorial you MUST purchase it from CILM

SCRAPKIT: Frozen in Time by Jen's Sweet Temptations

MASK: Of choice

Ok lets begin..

New Image 500 x 500 px

Open paper 1
Copy and close
New raster layer
Select all
Paste into selection
Apply your mask

Open bling 1
Copy and close
Move to the bottom of the tag
Image - Duplicate
Image - Flip
Merge down

Open frame 3
Resize with your largest side being 450
Copy and close
Paste as new layer
Add drop shadow
2, 2, 30, 3, black

Add your flowers and heart elements
Add drop shadows to them
Same settings as above.

Add your tube
Add drop shadow

Add text and copyright
Merge visible and your done :-)


Monday, October 12, 2009

Friday, October 9, 2009

Breast Cancer Awareness Blog Background

This background was made from Nikki's Pink Ribbon kit. You can purchase the kit HERE.

Breast Cancer Awareness

These snaggables were made from Nikki's Pink Ribbon kit. You can purchase it HERE.


Think Pink


SUPPLIES:

ARTWORK: © Jason Patterson
In order to use the image in this tutorial you MUST purchase it from MPT

SCRAPKIT: Pink Ribbon by Nikki of Creative Intentionz

MASK: Of Choice

WORDART BY ME: HERE

FONT: Bickham Script

Okay, lets begin...

New Image 500 x 500

Open paper 4
Copy and close
New raster layer
Select all
Paste into selection
Apply your mask of choice

Open ribbon 1
Resize by 25%
Copy and close
Paste as new layer
Mura's Meister with the following settings
Click to see full view

Image and video hosting by TinyPic

Get your magic wand and select the inside of the frame you've created
Expand by 5
Open paper 8
Copy and close
New raster layer
Paste into selection
Move beneath the frame

Open your wordart
Copy and close
Paste as new layer
See my tag for placement

Resize your canvas 600 x 600

Open your pink bow
Copy and close
Paste as new layer
Resize as needed

Open your bird
Copy and close
Paste as new layer
Resize as desired
See my tag for placement

Add drop shadows to all your layers
2, 2, 40, 3, black

Add your copyright and text
Merge visible and your done :-)

Wednesday, October 7, 2009

PMS


SUPPLIES:

ARTWORK: © Scott Blair
In order to use the image in this tutorial you MUST purchase it from MPT

SCRAPKIT: Vampire Lust by Gemini Creationz

MASK: Of Choice

New Image 600 x 500

Open paper 6
Copy and close
New raster layer
Selections - select all
Paste into selection
Apply your mask of choice
Layers - merge group

Open frame 1
Resize by 80%
Image - rotate right
Copy and close
Paste as new layer
Add drop shadow 2, 2, 40, 3, black

Open your blood spill
Resize by about 40%
Copy and close
Paste as new layer
See my tag for placement
Add drop shadow same as above
Image - mirror
Image - flip

Open your black rose
Resize it by about 40%
Copy and close
Paste as new layer
Place it on top of the blood stain
Add drop shadow, same as above
Image - duplicate
Image - mirror

Add your tube and any other elements

Add drop shadows to all layers
Add your text and copyright

Merge visible and your done :-)

Love, Faith and Hope


SUPPLIES:

Artist © PinupToons.
In order to use the image in this tutorial you MUST purchase it from CILM

SCRAPKIT: Love, Faith and Hope by Designed by Stina

TEMPLATE: #40 by Missy

Open your template
CTRL D to duplicate
Close the original
Delete your copyright layer

Select your larger circle layer
Select all - float -defloat
New raster layer
Open paper 1
Copy and close
Paste into selection
Delete your gray layer

Do the rest of the rest of the layers using the following papers
small circle = paper 10
larger heart = paper 26
smaller heart = paper 5
dotted line heart = paper 6
small hearts = paper 30

Start with the bottom layer and add a gradient glow to each layer
Alien skin - gradient glow the following settings
Use yellow for the pink layers and pink for the yellow layers
yellow = #fff62
pink - #ff61ff

Image and video hosting by TinyPic

Add drop shadows to all layers
3, 3, 30, 3, black

Open your tube
Resize by 84%
Copy and close
Paste as new layer
Add drop shadow, same as before

Open the butterfly and resize by about 50% or so
Copy and close
Paste as new layer
See my tag for placement

Open your wordart
Resize about 50%
Copy and close
Paste as new layer
Apply the pink gradient glow and a drop shadow to it

Duplicate your back pink circle
Apply mosiac glass with the following settings

Image and video hosting by TinyPic

Add your copyright and text
Merge visible and your done :-)

Emotions


SUPPLIES:

Artist © Elias Chatzoudis.
In order to use the image in this tutorial you MUST purchase it from MPT

SCRAPKIT: Emotions in Deep Pink by Bastelgalaxy

MASK: Of choice

New image 600 x 500

Open paper 6
Copy and close
Select all
New raster layer
Paste into selection
Apply mask of choice

Open frame 2
Resize by 50%
Copy and close
Paste as new layer
Move to the left
Image - duplicate
Image - mirror

Add your ribbon
Copy and close
Paste as new layer
See my tag for position

Open your jewel
Copy and close
Paste as new layer
See my tag for position
Image duplicate
Image mirror

Add your bow
Copy and close
Paste as new layer
See my tag for position
Image duplicate
Image mirror

Open your tube
Copy and close
Paste as new layer
See my tag for placement

Add drop shadows to all your layers
2, 2, 40, 3, black

Add copyright and text
Merge visible and your done :-)

Girls Rock


SUPPLIES:

Artist © Ismael Rac.
In order to use the image in this tutorial you MUST purchase it from AMI

SCRAPKIT: Say What? by Schnegge

MASK: Of choice

New image 500 x 500

Open paper 1
Copy and close
New raster layer
Select all
Paste into selection
Apply your mask of choice

Open frame10
Resize by 97%
Copy and close
Paste as new layer
Get your magic wand and select the inside of the frame
Expand by six
Open paper 5
Copy and close
New raster layer
Paste into selection

Open your black flowers
Resize by about 75%
Copy and paste as new layer
See my tag for placement
Duplicate and move down some
Open your girls rock star
Resize about 70%
Copy and paste as new layer
See my tag for placement

Open your tube
Add copy and close
Paste as new layer
Delete the part outside the frame

Open your black ribbon
Copy and paste as new layer
Delete the part outside the frame so it appears to be wrapping
Open up the pink bow
Copy and paste as new layer
Move to the center
See my tag for placement

Add any other elements you want to it
Add drop shadows to all layers 2, 2, 40, 3, black

Add your copyright and text
Merge visible and your done :-)

Tuesday, October 6, 2009

Imagine


SUPPLIES:

Artist © Jennifer Janesko.
In order to use the image in this tutorial you MUST purchase it from CILM

SCRAPKIT: Imagine by Rieneke Designs

MASK: WSL_Mask353 by Chelle

New image 500 x 500, white bg

Open paper 2
Copy and close
Paste as new layer
Apply your mask

Open frameflower1
Resize by 72%
Copy and close
Paste as new layer

Open your tube
Copy and paste
Delete the part outside of the frame, except the hair

Open gerbra's2
Resize by about 50% or so
Copy and paset as new layer
See my tag for placement

Place the rest of your elements to your liking
Add drop shadows to all your layers
2, 2, 40, 3, black

Add copyright and text
Add a gradient glow to both
Merge visible and your done. :-)

Purplex


Artist © Elias Chatzoudis.
In order to use the image in this tutorial you MUST purchase it from MPT

SCRAPKIT: Purplex by Dani

MASK: Of choice.

New image 600 x 500

Open paper 14
Copy and close
Select all
New raster layer
Paste into selection
Apply your mask of choice
Layers - merge - merge group

Open frame 1 with flower
Resize by 23%
Image - rotate right
Copy and close
Paste as new layer

Get your magic wand and select the inside of the frame
Expand by 6
Open paper 13
Copy and close
New raster layer
Paste into selection
Move layer beneath your frame

Open your tube
Resize by 93%
Copy and close
Paste as new layer

Open rose coursage 3
Resize by 7%
Copy and close
Paste as new layer
See my tag for placement

Add your other elements as desired

Add drop shadows to all your layers
2, 2, 40, 3, black

Add your coypright and text
Merge visible and your done :-)

Monday, October 5, 2009

Harvest Twist


Artist © Suzanne Woolcott AKA Gorjuss.
In order to use the image in this tutorial you MUST purchase it from her site

SCRAPKIT: Harvest Twist by Country Hollow Scraps

MASK: Of choice

Open new image 600 x 500

Open Paper 4
Copy and close
Select all
New raster layer
Paste into selection
Apply your mask
Merge group

Open frame 1
Copy and close
Paste as new layer
Open paper 7
Copy and close
Get your magic wand and select the insides of the frame
Expand by 6
New raster layer
Paste into selection
Move beneath the frame
Apply your drop shadow to the frame
2, 2, 40, 3, black

Open your pumpkin3
Copy and paste as new layer
Apply drop shadow, same settings

Open your leaves
Place them behind your frame

Open the flowers
Resize them with the largest side 100 px
Copy and close
Paste as new layer
See my tag for placement

Open your tube
Copy and close
Paste as new layer
Apply drop shadows to all your layers

Add your copyright and text
Merge visible and your done :-)

Sunday, October 4, 2009

Cherry Chocolate


Artist © Keith Garvey.
In order to use the image in this tutorial you MUST purchase it from MPT

SCRAPKIT: Cherry Chocolate by Bea's Creations

MASK: Of choice

New image 600 x 500

Open frame12
Copy and close
paste as new layer

Active your background layer
Open paper 9
Copy and close
New raster layer
Select all
Paste into selection
Apply your mask of choice

Active your frame layer
Get your magic wand and select the inside of the frames
Open paper 10
Copy and close
New raster layer
Paste into selection
Move that layer beneath your frame

Open your tube
Copy and paste as new layer

Take your square selection took and select parts of your tube
Paste as new layer and move beneath the frame
When you've done all four frames
Duplicate and go to image - photo - sepia
Zoom it by about 500x's
Get your eraser tool and erase the parts you want in color

Add your elements and drop shadows, 2, 2, 40, 3, black
Add your copyright and text
Merge visible and your done.

Saturday, October 3, 2009

I Am Batty


Artist © Elias Chatzoudis.
In order to use the image in this tutorial you MUST purchase it from MPT

SCRAPKIT: I Am Batty by Sticky Kisses Designs

MASK: Of choice.

New Image 500 x 500
Open frame 4
Resize 59%
Copy and close
Paste as new layer

Open your tube
Resize about 97%
Copy and close
Paste as new layer

Open paper 12
Copy and close
Select your background layer
Select all
New raster layer
Paste into selection
Apply your mask of choice
Merge group

Activate your tube layer
Open bat2
Resize by 28%
Copy and close
Paste as new layer
See my tag for placement

Activate the frame layer
Open the tree
Resize by 77%
Copy and close
Paste as new layer
Delete the bottom part sticking out of the frame

Activate tube layer
Open bow5
Resize by 75%
Copy and close
Paste as new layer
See my tag for placement

Activate your mask layer
Open your cloud
Resize by 44%
Copy and close
Paste as new layer
See my tag for placement

Activate your frame layer
Open flower 3
Resize by 23%
Copy and close
Paste as new layer
See my tag for placement
Duplicate and place the other one

Open flower1
Resize by 30%
Copy and close
Paste as new layer
See my tag for placement

Add drop shadows to all your layers except your mask
2, 2, 40, 3, black

Add your coypright and text
Merge visible and your done.

Friday, October 2, 2009

Witchy Canvas


Artist © Elias Chatzoudis.
In order to use the image in this tutorial you MUST purchase it from MPT

SCRAPKIT: Schnegge's Collab Kit contribution
This can be found at Twilight Scraps.

MASK: Of choice

New Image 500 px x 500 px
Select all

Open paper of choice
Copy and close
Paste as new layer
Apply your mask of choice
Merge group

Open frame of choice
Copy and close
Paste as new layer
Get your magic wand
Select the inside of the frame
Expand by 6
New Raster layer
Open paper of choice
Copy and close
Paste into selection
Move layer beneath the frame

Open your tube
Copy and close
Paste as new layer
Duplicate tube layer
Resize by about 200%
Move beneath the frame
Lower opacity to 75%
Delete the part outside of the frame
Merge that layer down

Get your magic wand and select the inside of the frame again
Expand by 6
Apply the texture - canvas
default settings

Add tube and elements of choice
Add copyright and text
Add drop shadows to all layers except mask
Merge visible and your done.


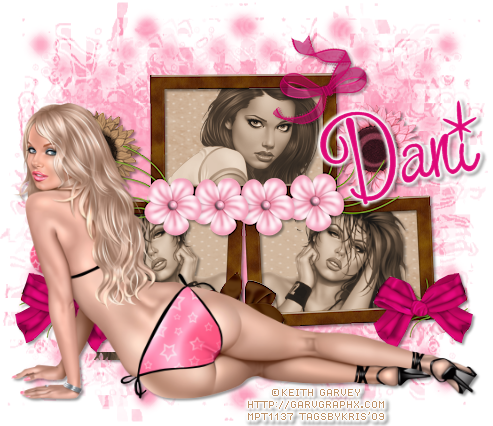
Pink Chocolate


SCRAPKIT: Pink Chocolate by Dani

Artist © Keith Garvey.
In order to use the image in this tutorial you MUST purchase it from MPT

MASK: Of choice

New image 500 x 500
Open paper of choice
Copy and Close
Paste as new layer
Apply your mask of choice

Open your frame
Copy and close
Paste as new layer

Take your magic wand and select the inside of the frame
Expand by 6
New raster layer
Open Paper of choice
Copy and close
Paste into selection

Open your tubes
Get your square selection tool
Copy the head shots
Paste as new layer
Effects - photo effects - sepia - default settings
Do the same for all three

Open your big tube
Copy and close
Paste as new layer

Open your elements
Copy and close
Paste as new layer
Resize as needed

Add drop shadows to all your layers
3, 3, 30, 3, black

Add your copyright and text
Merge visible and your done. :-)