Friday, July 31, 2009

Pink Glamour Tutorial


SUPPLIES

TEMPLATE: Template #16 by Bel Vidotti

Artist © PinupToons.
In order to use the image in this tutorial you MUST purchase it from CILM

SCRAPKIT: Glamour in Pink by Jens Sweet Temptations

PLUGIN: Mura's Meister Copies

Ok lets begin...

Open your template #16
CTRL + D to duplicate
Close your original
Resize by 66%

Activate the splash layer
Select all, float and defloat
Open paper 13, copy
Paste as new layer
Invert and delete
Delete the splash layer

Select the circles layer
Add new raster layer
Fill with color #ef259d
Select circles layer again
Select all, float, defloat
Invert, select color layer and delete
Delete black circle layer
Add noise to the pink circle layer

Image and video hosting by TinyPic

Select your frame back layer
New raster layer
Select two colors from the other part of your tag
I'm using #feddf5 and #ff7dcb
Set your foreground/background to these colors
Fill your layer
Select your frame back
Select all, float, defloat
Select your gradient
Invert and delete
Select none
Add noise
Same as above but change the strength to 20

Use Paper 21 for the frame, same as above.


I applied bevel to my frame. The settings are below

Image and video hosting by TinyPic

Close off your frame and gradient layer
Merge visible

Get your text tool
Type your name (white, white)
Convert to raster layer
Mura Miester Copies with the following settings
Image and video hosting by TinyPic

Select gradient layer
Select all, float, defloat
Invert, select text layer
Delete

Merge visible
Add your elements and tubes to your liking
Copyright and text


Tuesday, July 28, 2009

Mask 15


New mask :-) Click on it to be taken to the download page.

http://dl5.glitter-graphics.net/pub/2374/2374165yh02allhj8.png

This tag was made from a tutorial that can be found here.

Sunday, July 26, 2009

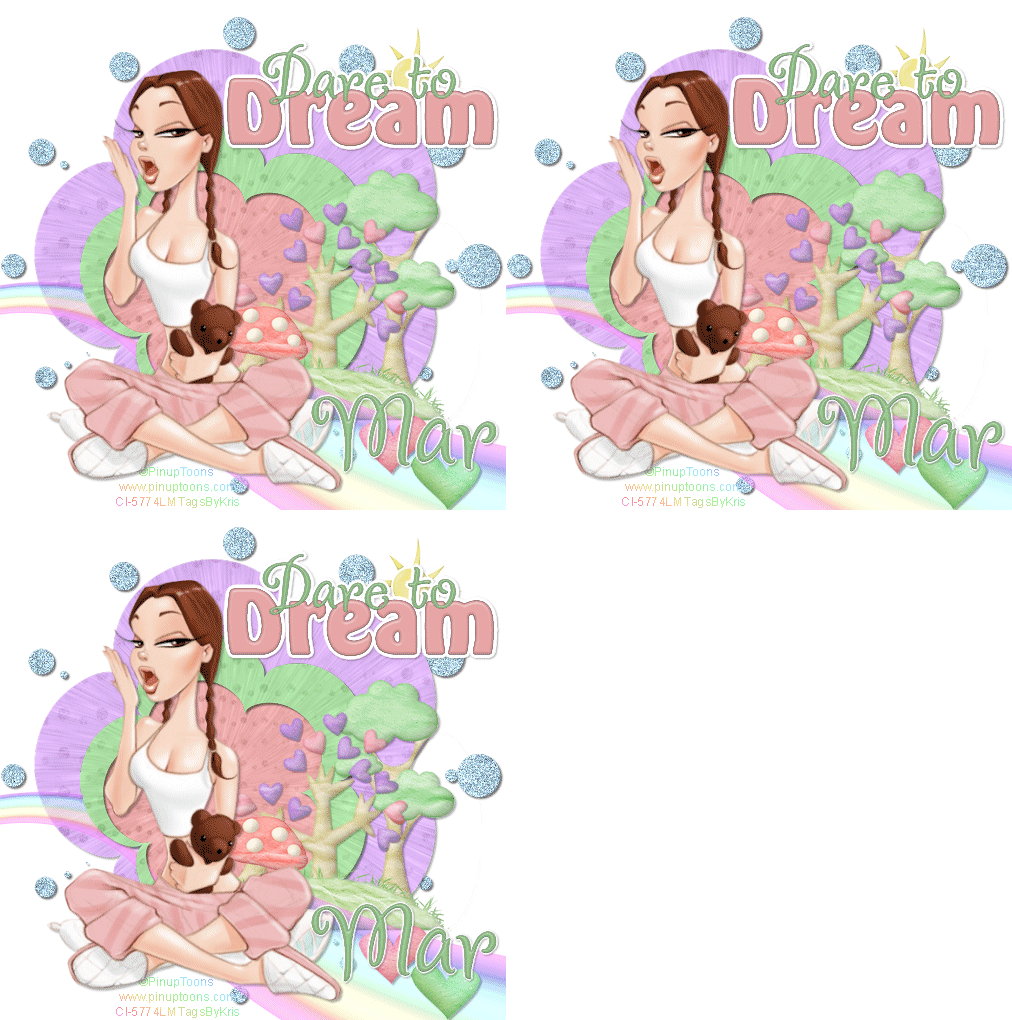
Dare to Dream Tutorial


TEMPLATE: tagtemplate20 by Bel Vidotti

Artist © PinupToons.
In order to use the image in this tutorial you MUST purchase it from CILM

SCRAPKIT: A Magical Day by Scrapping Mar

WORDART: HERE

Open template
CTRL+D to duplicate
Select Circles layer
Create new rastor layer
Select circles layer
Select All - Float - Defloat
Open paper 3
Copy
Select new layer you created
Paste into selection
Delete the circle template layer

Repeat these steps on the layers w/ the following papers

Bigger Flower - paper 1
Little flower - paper 2
frame - paper 5

Resize your tag 500 pixels on the largest side

Add your elements, tube, copyright and text

Hide your white bg and blue litle circles
Merge visible

Unhide your layers
Select the little circles
select all - float - defloat
Merge down
Noise - 30
Noise - 33
Noise - 36

Duplicate your tube layer x2
Move one layer on top of the noise layers and merge down
Do this to each one
Save as a pspanimation
Open in Animation Shop
Save as GIF and your done.

Saturday, July 25, 2009

Loving You Always Tutorial


SUPPLIES

SCRAPKIT: Dancing Queen by KnC Scrapz

Artist © Keith Garvey.
In order to use the image in this tutorial you MUST purchase it from MPT

TEMPLATE: Template 3 by Peachy Keen Designs

PLUGINS: (optional) Xenofex 2 - Constellation

TUTORIAL:

Lets begin.

Open your tag template
CTRL+D
Delete your copyright layer

Delete the Flourishes layer

Go to your square layer
Open paper 10
Copy, paste as new layer
Select the tag background layer again
Select all - float - defloat
Select paper layer
Invert and delete
delete the original image layer

Do the same for the following layers

square frame = paper 1
hearts - paper 9
heart frame - paper 1

Select your text and free rotate left 90%

Open glittergangle
Resize 35%
Copy and paste as new layer
Place in the frame

Open music notes
Resize 50%
Copy and paste as new layer
Send to the bottom
Resize again by 50%
Duplicate and see my tag for placements
Add noise to each about 80

Open slippers 2 and resize 8%
Copy and paste
Move on top of the middle heart

Do the same with slipper 2 but move to the right
and the piano on the right 15% resized

Apply drop shadow to the hearts frames
Merge down the frame and hearts
Move your hearts downward to the edge of your brown frame
See my tag for placement

Resize drapes by 50% and place on the back square frame
Open the sunflowers
Resize by 15%
Place on top of the hearts
See my tag for placement

Open bow 2
Resize 15%
Place on the right corner of the drapes

Open butterfly 2
Resize 15%
See my tag for placement

Add your copyright and text

Close off your notes layer, square, and glitter dangle
Apply drop shadows
Merge visible

Merge down your two bottom layers (musical notes & bg)
Select your middle layer (glitter dangle)
Select all - float - defloat
Merge visible
Duplicate x2
Get your lasso tool and press CTRL while circling the part you don't want to glitter (the tube part)
Noise - 50 1st layer
Noise 47 2nd layer
Noise 44 3rd layer

If you're using the same tube as me
Get your magic wand and select the silver on your tube
Xenofex 2 - Constellation
http://i30.tinypic.com/25swyed.jpg
Use random each time

Save as pspanimation and open up animation shop

Save as GIF and your done.

Friday, July 24, 2009

Learning is a Treasure Tutorial


SUPPLIES

TEMPLATE: Template #1 by Scraps by CWD

SCRAPKIT: Welcome Spring by Country Hollow Creations

Artist © Daniel Esparza.
In order to use the image in this tutorial you MUST purchase it from CILM

WORDART: By me: HERE

PLUGINS: Toadies - Where are you

TUTORIAL:

Okay lets begin.

Open your template
CTRL+D to duplicate
Delete copyright information layer

Go to your tag background layer
Open paper 9
Copy, paste as new layer
Select the tag background layer again
Select all - float - defloat
Select paper layer
Invert and delete
delete the original image layer

Do the same for the following layers

dotted lines - paper 7
circle - paper 4
circle frame - paper 3
rectangle frame and rectangle - delete
mid square - paper 12
mid square frame - paper 3
left square - paper 11
right square - paper 910
right square frame - paper 9
left square frame - paper 2

Open your tube of choice
copy and paste as new layer
Move under the desired frame
Erase the parts on the outside of the frames
Repeat for the other two frames

Open string flower
Resize by 15%
Copy and paste as new layer
See my tag for placement
Do this again but move it to the other frame

Open daffodil resize 27%
See my tag for placement

Insert your wordart
Add your copyright and text

Close off your circle layer and white bg layer
Merge visible
Open up your closed layers
Select circle layer
Select all - float - defloat
merge down
Duplicate x3
Toadies - Where are you - ok
Repeat - change the overdose higher
Repeat - change the overdose even higher

Duplicate your type layer x2
Move one layer on top of the bg layer and merge down
repeat for your other layers
Save as a pspanimation

Open up animation shop
your speed should be about 30
save as a gif and your done


Thursday, July 23, 2009

Fae Love tutorial


SUPPLIES

TEMPLATE: Template59 by Yvette

SCRAPKIT: Rocker Girl by Dani

Artist © Joel Adams.
In order to use the image in this tutorial you MUST purchase it from CILM

PLUGINS:
Lokas Aqua or Eye Candy Glass
Richard Rosenman - Scanlines

Okay lets begin

Open your template
Shift+D to duplicate, close original
Delete your copyright layer

Select words layer
Open paper 8
Copy, paste as new layer
Select words layer
Select all - float - defloat
Select paper layer
Invert and delete.

Little hearts - black
dotted heart - black
heart - paper 7

Canvas size with the following settings

Add your tube of choice

Open your three hearts
Resize by 20%
Place on top of the black hearts

Open your purple and pink gerber daisy
Resize 50%
Place behind your tube
Duplicate the purple x2 and pink x2
Place them according to my tag

Open double bow 2
Resize by 30%
Copy and paste as new layer

Apply Lokas Aqua to your black hearts
You can also make it glassy with Eye Candy Glass

Close off your background layer
Merge visible
Duplicate your tag
Gaussian Blur 10
Richard Rosenman - Scanlines
Default settings

Merge visible
Add copyright and text


Wednesday, July 22, 2009

Garv Girl Tutorial


SUPPLIES

TEMPLATE: Template #16 by Chica

SCRAPKIT: Ice Diamond by Cay's Creations

Artist © Keith Garvey.
In order to use the image in this tutorial you MUST purchase it from MPT

Okay lets begin

Open your template
CTRL+D to duplicate

Select Circles
Open pp_013
Copy and paste as new layer
Select circles again
Select all - float - defloat
Select your paper layer
Invert and delete
Delete Circles layer

Do the same for the rest of the layers up using the following papers

Rectangles - paper 16
Square back - paper 6
hearts - paper 10
sweet/sugar wordart - paper 4
girl wordart - paper 9
select the garv wordart
shift+h
use the following settings
Photobucket

Open cayscreation_icediamond-el_023 and resize 8%
Copy and paste as new layer
Move over the doodle in the template
Duplicate and mirror
Delete the template layer

Open cayscreation_icediamond-el_014
Resize 10%
Copy and paste as new layer
Move on top of the square frame on the right corner
Image - duplicate
Image - mirror
Merge down
Image - duplicate
Image - flip
Move your bottom to fit the bottom of your frame

Open cayscreation_icediamond-el_055
Resize by 6%
Copy and paste as new layer
Place over your back right circle
Image - duplicate
Image - mirror
Merge down
Image - duplicate
Image - flip
Move your bottom to fit your bottom circles

Open your tube of course this particular one needs to be by Keith Garvey

paste as new layer and delete the extra parts out of the frame on the bottom

Add your drop shadows and apply your gradient glows or outlines if you so choose

Add your copyright info and text and your done.


Monday, July 20, 2009

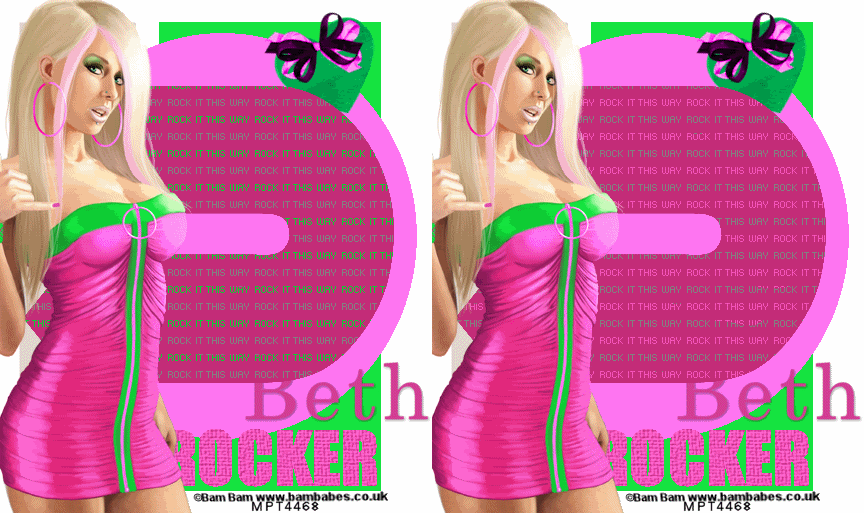
Rock It That Way Tutorial

Image and video hosting by TinyPic

SUPPLIES:

TAG TEMPLATE: #18 by Rose

Artist © Daniel Esparza.
In order to use the image in this tutorial you MUST purchase it from CILM

SCRAPKIT: Black and White Collection: Pink by Rieneke Designs

Open your template
CTRL+D to duplicate
Delect your copyright information

Select Raster 4
Open Paper3
Copy and paste as new layer
Select raster4 again
Select all - float - defloat
Select your paper layer
Invert and delete

Do the same for the rest of the layers up using the following papers

Raster 7 = Paper 7
Raster 2 = Paper 1
Raster 5 = Paper 2
Raster 9 = Paper 14

Select Raster 3
Duplicate this layer
Take your color dropper and left click the grey in the words
Take your color dropper and right click a color in the picture
Get your color replacer tool Image and video hosting by TinyPic
Use the following settings
Image and video hosting by TinyPic
Take your curser and trace out the whole line
Do this all the way down, alternating lines
When you're done, pic another color and do the other lines
Close off the layer and repeat the steps on the 2nd layer
Only using the opposite color for the lines

Next add your tube
I'm using the awesome work of Daniel Esparza

Open bow 2, resize by about 48%
Copy and paste as new layer
See my tag for placement
Add other elements to your liking

Duplicate your black arrow and move one under each wordart
Merge the word art down onto it
Close off your tube layer, and two black arrow layers
Merge visible

Add your copyright information and text

Duplicate your tube and move one layer on top of each arrow
Merge down.

Do the same to your full tag but keep it under the other
Merge down

Save as a pspanimation file and open up in animation shop.

Save as a gif and your done.

If you have any trouble with this tutorial, please don't hesitate to contact me
calirose.love@gmail.com

The following tags were made from the ladies at Graphic Groupies
They are fantastic!!!

PhotobucketPhotobucketPhotobucketPhotobucket


Tattoo Tutorial


SUPPLIES

TEMPLATE: SC Designz Scraps Template 2

SCRAPKIT: Pink Grapes by Dorthi Designs

Artist © Keith Garvey.
In order to use the image in this tutorial you MUST purchase it from MPT

Okay lets begin
Open your template up in PSP
CTRL+D to duplicate
Resize by 71%

Select your bottom layer
Open Paper1_Dorthi
Copy and paste as new layer
Select your bottom layer
Select all - float- defloat
Select your paper layer
Invert and delete

For the next layer we're going to delete those dots
Open frame11_Dorthi
Resize 64%
Copy and paste as new layer
You may have to adjust so that it's even on your tag

Select the next layer up which is Raster 2
Open Paper20_Dorthi
Copy and paste as new layer
Select all - float- defloat
Select your paper layer
Invert and delete

Repeat this on the other white squares also.

Next select papers for the inside of your frames
Repeat the steps above for each of the gray squares

Leave your staple layers alone

Next is your stars layer
Open a button of choice and two flowers
Resize them by about 10%
Copy and paste as new layers
Arrange them on top of the stars then delete the star layer

Next open your flower band
Resize it by about 25%
Copy and paste as new layer
Rotate by 90%
Place it over the left brackets
Image - duplicate
Image - mirror
Place over the right bracket
Delete the bracket layer

Open your tube of choice
I'm using the fabulous work of Keith Garvey
Copy and paste your tube as a new layer
Position your tube in the frame and then select the smaller paper layer
Select all - float - defloat - invert
Get your eraser tool and erase the bottom part of the tube
Just the part outside of the frame

Do the same with the same tube but enlarge the tube by 120%
Make sure to focus on different parts of the tube for the other frames

Add a few more elements and your drop shadows

Merge visable, add your copyright info and your text &

Your done :-)

Friday, July 17, 2009

Strawberry Hill Tutorial

Image and video hosting by TinyPic

SUPPLIES:

SCRAPKIT: Strawberry Hill by Gemini Creationz

TUBE: Artist © Amanda Fontaine
Her art is no longer available but I purchased it from AMI

PLUGINS: Alien Skin Xenofex 2 - Constellation

MASK: Of Choice

New image 500 x 500

Open GC_SH_paper1
Resize 62%
Copy and paste as new layer
Apply mask of choice
Merge group

Open GC_SH_clusterframe2
Resize 75%
Copy and paste as new layer

Select your mask layer

Open GC_SH_paper3
Resize by 62%
Copy and paste as new layer
Get your magic wand and select the top frame
Expand by 3
Select your GC_SH_paper3 paper layer
Invert and delete

Open GC_SH_paper2
Resize by 62%
Copy and paste as new layer
Get your magic wand and select the top frame
Expand by 3
Select your GC_SH_paper2 paper layer
Invert and delete

Open GC_SH_paper10
Resize by 62%
Copy and paste as new layer
Get your magic wand and select the top frame
Expand by 3
Select your GC_SH_paper10 paper layer
Invert and delete

Select your tubes of choice
I'm using the adorable artwork of Amanda Fontaine
Copy and paste as new layers and position underneath your frame
Erase all extra tube that is outside of the frame
Do the same for the other two frames.

Open the GC_SH_chickenwire
Resize it by 75%
Copy and paste as new layer
Send to the bottom

Add your drop shadows

Image and video hosting by TinyPic

Add elements and any wordart or text that you want
Of course, your copyright information if required

Close off your chicken wire layer, mask and background layer
Merge visible

Unhide your other layers
Select your mask layer
Merge down

Select all
Float
Defloat
Merge Down

Duplicate x2 for a total of 3 layers
Alien Skin Xenofex 2 - Constellation with the following settings

Image and video hosting by TinyPic

for the middle and bottom layer press the random seed each time

Duplicate your tag layer x2
Move each layer on top of the constellation layer and merge down

Save your tag as a pspanimation file

Open it up in animation shop
and save your tag as a jpeg.

I hope you have enjoyed my tutorial

De-Lish Tutorial

Image and video hosting by TinyPic

SUPPLIES:

SCRAPKIT: DeLish by Melissaz Creations

Artist © Keith Garvey.
In order to use the image in this tutorial you MUST purchase it from MPT

MASK: Zuzzanna

PHOTOS: Public Domain from the following sites
Site #1
Site #2

Okay lets begin

Open new image 500 x 500
Open MC_Delish_Frame4 and resize by 61%
Copy and paste as new layer
Move your frame in the right lower corner

Open your tube and put it into position
Open MC_Delish_Elements6
Select your magic wand and select the flowers with stems
Copy and paste onto your image and move to the layer to the bottom

Open MC_Delish_Elements3 and resize by 500 px on the largest side
Copy and paste and move the layer to the bottom
Image - duplicate
Image - mirror

Open your cupcakes and select one and add it to your tag

Add your text and copyright

Open MC_Delish_Paper11 and move to the bottom
Apply your mask of choice

Close off your mask layer and white bg layer if you have one
Add drop shadows if desired
Merge visible

Open your sweet pictures included in my supplies
Duplicate your tag that you merged x3 for a total of 4 layers

Copy and paste the first picture
move it below your first layer and position it behind your frame
Delete any part that is sticking out.

Do the same for the other pictures

Unhide your mask layer and bg layer and merge them
Duplicate it and put one layer behind each tag layer
Merge them down so you have a total of 4 layers

Save it as a psp animation file and open up animation shop

Set your speed to about 30 and save

I hope you enjoyed my tutorial.

Things I Love Tutorial

Image and video hosting by TinyPic

SUPPLIES

Tag Template: Bel Vidotti

ScrapKit: Things I love by Dani

Artist © Joel Adams.
In order to use the image in this tutorial you MUST purchase it from CILM

Open tag template and CTRL D to duplicate
Delete copyright layer
Resize with your largest side being 500 pixels

Start at your bottom layer and pick a paper of choice
Open your paper and copy
Go to your template paste as new layer
Select your cloud layer
Select all, float and defloat
Invert and delete

Do the same for the rest of the layers

After you get to your LOVE layer
Duplicate it and select the bottom layer
Go to Adjust, blur, motion blur
Use the following settings.

Image and video hosting by TinyPic

Duplicate your blur layer and then merge down
Do this about 5 times
Adjust - hue/saturation/lightness
Use the following settings.

Image and video hosting by TinyPic

Repeat these steps to the larger heart
Move the heart layer on top of the back cloud

Repeat the above steps for the background cloud layer also

Open your tube of choice
I'm using one of my older favorites from Joel Adams.
Copy and paste as new layer
Position your tube over the wordart

I merged my top pink heart layer, and the green layer &
lowered the opacity to 70% but this is optional.

Open your flowers and copy and paste as new layers
Position them on top of your blue cloud layer
See my tag for placement

Now add your elements of choice

Merge visible

Add your copyright and text and your done.


Wednesday, July 15, 2009

I ♥ Strawberries Tutorial

Image and video hosting by TinyPic

SUPPLIES:

TEMPLATE: Tag Template #9 by Bel Vidotti

TUBE: Artist © Amanda Fontaine
Her art is no longer available but I purchased it from AMI

SCRAPKIT: Strawberry Patch by Cazie

MASK: Zuzzanna

This tutorial will be quick and easy and pretty self explanatory.

Open your template up
Resize by 500 on your largest side
Delete your copyright layer

Chose your papers of choice

copy and paste your papers on top of the templates
Select the template layer and select all, float and defloat.
Select paper layer, invert and delete.
Do this for all layers

I added noise of about 50 to my bottom layer.

Apply your mask of choice.
I'm using Zuzanna which can be found at the link listed above.
Merge group and then lower your opacity to about 50%

Add your elements, tube, wordart, copyright and text and your done.

Friday, July 10, 2009

Rainy Woodlands Tutorial

Image and video hosting by TinyPic

SUPPLIES

SCRAPKIT: Woodlands by StephsGraphx

Mask: Of Choice

Artist © Daniel Esparza.
In order to use the image in this tutorial you MUST purchase it from CILM

Ok lets get started

New image 500 x 500, white background

Open stephg_wl_paper7
Copy and paste as new layer and apply your mask
Open your silver button and use Mura Meister filter to make a circle.
If you do not have this filter then just duplicate your button enough times to make a circle

Open your tube of choice
I'm using the wonderful work of Daniel Esparza
Position it in your frame
Duplicate it and put one tube on top of the frame and one on the bottom.
Get your eraser tool and select the top layer (on top of the frame)
Delete the bottom part that is touching the frame
Select your bottom tube layer and delete just the part of the tube
that is sticking out of the frame.
Add your drop shadow to your bottom tube

Open up your cottage and copy and paste it as a new layer
Put it in the background of your tube (see my for placement)
Add dropshadow

Open your three flowers of your choice and other elements
Resize them and place them on your tag
Add your text and copyright to your tag and your done.

You may continue on if you want to add the animated effect.

ANIMATION:

Close off your bg layer and mask layer and merge visible
Unhide your other layers and close off your main layer, merge visible
Now you should have two layers
Get your lasso tool and draw a circle
Follow your frame but don't go outside of your frame
Try to keep it where it doesn't show through the holes on your button frame
Duplicate your mask layer x2 for a total of 3 frames
Add noise to your first layer of 65, gaussian
Repeat the steps on the other two layers, each time going up x5
(ex. 65, 70, 75)
Now go back to the top layer and go to adjust-image-motion blur
Use the settings below for each layer
Image and video hosting by TinyPic
Duplicate your top tube layer x2 and drag each one so that it's on top of the rain layer and merge each one down.

Save your document as a pspanimation file and open it up in animation shop.

All you really have to do is save your image in animation shop and your done.

Of course you can tweet the settings if you prefer but that's totally up to you.

I hope you enjoyed my tutorial.


Who I Am Tutorial

Image and video hosting by TinyPic

Artist © PinupToons.
In order to use the image in this tutorial you MUST purchase it from CILM

SCRAPKIT: Adoration by Gemini Creationz

SUPPLIES: Here

Let's get started.

Open new image 500 x 500
Open GC_Adrn_paper17
Resize by 62%
Copy and paste as new image
Apply the mask provided kls-09-mask14

Open GC_Adoration_frame1 and resize 58%
Copy and paste as new layer on your new image
Now stretch the frame into an oval
Resize again by 75%, be sure that all layers is NOT checked
We just want to resize the frame

Open your silver pattern (included in supplies)
Double click on the foreground color
Find your pattern and use the following settings
Image and video hosting by TinyPic
Create new raster layer and move it below your frame
Select your magic wand and select the inside of your frame
Expand by 3 and use your paint bucket to fill in the frame

Open your tube of choice
I’m using the wonderful work of PinupToons
I resized by 95%
Copy and paste as new layer
Position your tube next to your mirror that you created
See my tag for reference.
Image Duplicate
Image Mirror
Lower your opacity to 80%
Select your silver layer
Select all, float, defloat
Invert and delete

Add some elements and the wordart provided if you so desire
Text and of course copyright info if your using a PTU tube
And you’re all done.


Wednesday, July 8, 2009

Mask 14

Tangerine Dreams Tutorial

Image and video hosting by TinyPic

SUPPLIES

Artist © Dominic Marco.
In order to use the image in this tutorial you MUST purchase it from CILM

SCRAPKIT: Tangerine Dreams by Baby Cakes Scraps


New Image 500 x 500

Open your tube of choice (I'm using the wonderful work of Dominic Marco)

Open BCS_Square Frame and BCS_Scatter Dush

resize each so that the longest side is no larger than 500 pixels

Copy and paste as new layer on your new image

Layer pallate should be like the following

tube
frame
dust
background

Now select your frame layer and resize by 60%
Free rotate by 25% to the right
Move your frame towards the top left corner
See my tag for placement

Image duplicate
Image mirror
Image flip
I moved my bottom frame over see my tag for placement

Select your dust layer
Resize by 90%
Image-mirror

Open BCS_Paper One
Copy and paste as new layer

Get your magic wand and select the inside of the top frame
Expand by 8
Select your paper layer
Invert and delete

Open BCS_Paper Eighteen and do the same as you did on the top frame to the bottom one.

Open BCS_Doodle Four and place it behind the frames and paper but on top of the dust

Add other elements to your liking, most of the elements I added I resized by about 30% or so.

After your done, close off your background layer, add your drop shadows and merge visible.

Duplicate the layer.
Adjust-blur-gaussian blur - 10
Effects - texture - mosiac antique

Image and video hosting by TinyPic

Add your copyright and text and your done.

I hope you enjoyed my tutorial.

Monday, July 6, 2009

Sweet as Sugar Tutorial

Image and video hosting by TinyPic

Scrap Kit is called Spring Garden by Gemini Creationz

Artist © Daniel Esparza.
In order to use the image in this tutorial you MUST purchase it from CILM

Mask is by Zuzzanna

Open a new image 600 x 450

Open mask of choice, I'm using a wonderful mask by zuzzanna-mask60

Open GC_ASBT_frame2, copy and paste as new layer

Select the background layer

Open paper of choice, copy and paste as new layer

Apply your mask of choice.

Open three more papers of choice
Copy each and paste each as a new layer

Get your magic wand and select the inside of one of the frames
Expand by 5, invert and select the paper and press delete
Repeat this on each frame

Open your tubes of choice. I'm using the wonderful artwork of Daniel Esparza.

Place your tubes underneath your frame and then change the blend mode to Luminance (L)

click on your paper layer select all, float, defloat, invert and hit the delete key.

Repeat this for all your frames.

Add your elements, wordart, copyright info and text and your done.