
TEMPLATE: #22 by Lacarolitas Designz
TUBE: Artist © Elizabeth Austin.
In order to use the image in this tutorial you MUST purchase it from CILM
SCRAPKIT: Sweet Tooth by Hippiedaze
MASK: of choice
Okay lets begin...
Open your template
CTRL+D to duplicate
Close your original
Delete your copyright information
Resize canvas to 500 x 500
Select the bottom layer
Open paper of choice, copy and close
Select all float, defloat
New raster layer
Paste into selection
Do the same for the rest of the layers.
Apply gradient glow and drop shadows to your layers
Add your tube, resize if desired
Add elements and add drop shadows to them
Add your text and copyright and your done.

Kit: Tiffany by GeminiCreationz
TUBE: Artist © Keith Garvey.
In order to use the image in this tutorial you MUST purchase it from MPT
Mask: Vix_Mask291
New image 500 x 500 px, white bg
Open GCZ_tifny_frame, resize by 73%
Copy and paste as new layer
Open your tube of choice.
I resized the tube I’m using by 96%
Copy and paste as new layer
Move her to the side
See my tag for placement
Delete the part of the tube that is outside the frame
Get your magic wand and select the inside of the frame
Expand by 5
Open paper 6, copy and close
New raster layer
Paste into selection
Move beneath the frame
Duplicate your tube layer and resize it by about 250%
Place it over your black bg, lower the opacity to 50%
Put the blend mode to Luminance (legacy)
Add some elements to your liking
Add drop shadows to all your layers
2, 2, 30, 3, black
Apply your mask. I’m using the mask above but any mask will be fine.
Add your copyright and your text
Thanks for trying my tutorial
This fantastic tag was made using my tutorial by Cindy. Thanks Cindy!


SUPPLIES:
TEMPLATE: TagTemplate48 by Missy
TUBE: Artist © Cris de Lara.
In order to use the image in this tutorial you MUST purchase it from MPT
SCRAPKIT: Tranquility by Tantalizing Designz
BLING: Made by Me but I lost the file, so any heart bling will do.
Okay lets begin...
Open your template
CTRL+D to duplicate
Close your original
Delete your copyright information
Resize canvas to 500 x 500
Select the bottom layer
Open paper 21, copy and close
Select all float, defloat
New raster layer
Paste into selection
Do the same for the rest of the layers.
When you get to your frame layer
Select a color from your tag
New raster layer
Frame layer - select all - float - defloat, invert
Select the color layer - and hit delete
Add Gradient Glow to all your layers
I used the color #6b5957
Add drop shadow 2, 2, 30, 3 black
Add your tube and drop shadow
Add some elements and copyright also any text you want
Pretty much finish up your tag before we add the bling
After your done, merge your tag
Save as pspanimation
Open your bling and tag up in AS
Delete the black layer on your bling
Duplicate your tag until you have 18 frames
Select all on both
Drag your bling onto your tag
Save as a gif and your done.
Thanks for trying my tutorial. I'd love to see your results.

SUPPLIES:
SCRAPKIT: October Romance by Athena Designs
TUBE: Artist © PinupToons.
In order to use the image in this tutorial you MUST purchase it from CILM
Note* You cannot purchase this particular image because it was a limited time bonus tube but you can purchase many similar.
TEMPLATE: #4 by Alyssa's Templates
Mask: Your Choice
Okay lets begin...
Open your template
CTRL+D to duplicate
Close your original
Delete your copyright information
Resize 71%
Open Paper16TS
Copy, paste as new layer
Arrange - send to bottom
Delete the pink layer
Apply your mask of choice.
Merge Group
Duplicate and merge down
Open paper of choice
Copy and close
Select the bottom rectangle layer
Select all, float, defloat
New raster layer
Paste into selection
Do the same for the rest of the layers
Delete the two heart layers
Add your tube
Now add gradient glow and drop shadow to your frame layers
Add drop shadow to the rest
Add elements to your liking.
Add your copyright information and text.
Select your smaller rectangles
Xero - Frittulary with the following settings

Copy - merged
Open animation shop, paste as new animation
Go back to psp
Undo and redo the frittulary going up on the variation by 2
Copy merged
Back to AS, paste after the current frame
Do the same thing again, increasing the variation again
Copying and pasting after current animation
Save and your done.
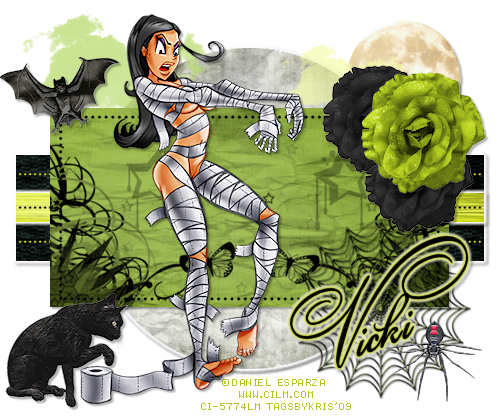
Scrap Kit: Ghosts of Halloween's Past by Gemini Creationz
Artist © Daniel Esparza.
In order to use the image in this tutorial you MUST purchase it from CILM
Template: 50 by Kristin
This tut will be quick and easy
I'm cutting you guys some slack on this one :-)
Open your template
CTRL+D to duplicate
Close your original
Delete your copyright information
Open paper of choice
Copy and close
Select the bottom layer
Select all, float, defloat
New raster layer
Paste into selection
Do the same for the rest of the layers.
Apply gradient glow to each layer and drop shadow
Add your elements and tube
Copyright and text and your done.
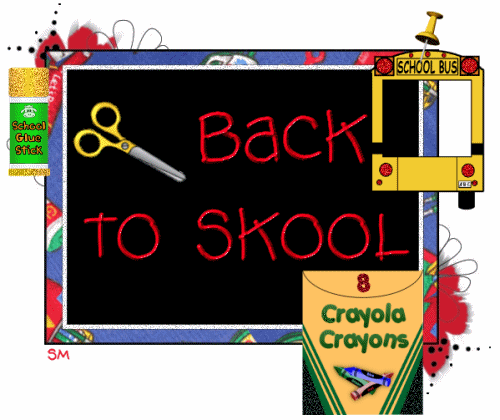
That's right guys, back to school for me... I'll be around a little but not very often. I will miss everyone dearly and I'll be back around mid December :-)
Until Then, Peace ☮

SCRAPKIT: Marina by Schnegge
Artist © Joel Adams.
In order to use the image in this tutorial you MUST purchase it from CILM
TEMPLATE: SWAK Scraps Template 4
Okay lets begin
Open your template
CTRL+D to duplicate
Close your original
Delete your copyright information
Resize with your longest side 500 px
Canvas size 500 x 500
Fill your bg layer with white
Select the next layer up
Choose a paper
Copy and close
Select all, float, defloat
New raster layer
Paste into selection
Do the same for the rest of the layers
Apply gradient glow to each of your layers
I used a yellow color from my tag
Apply drop shadow 2, 2, 30, 2 black
and then -2, -2, 30, 2, black
Apply your tube and elements
I added a gradient glow to my tube also
Add drop shadows to your elements and tube 2, 2, 30, 2, black
Add your copyright information and your text and your done.
Thanks for trying out my tutorial

SUPPLIES
TEMPLATE: Kristin - Template 58
Artist © PinupToons.
In order to use the image in this tutorial you MUST purchase it from CILM
SCRAPKIT: Melissa by Maggie's Scraps
MASK: ©Essexgirl
Okay lets begin
Open your template
CTRL+D to duplicate
Close your original
Delete your copyright information
Open paper of choice
Apply your mask
Select flower layer
Delete it
Select the BRAT layer
Select all, float, defloat
Open paper of choice, copy and close
New raster layer
Paste into selection
Do the same for the rest.
I used the hue/sat/lue for the stars and smaller words

Apply gradient glow on your layers and drop shadow
add your elements, text, copyright and tube.
And that's it.
SUPPLIES
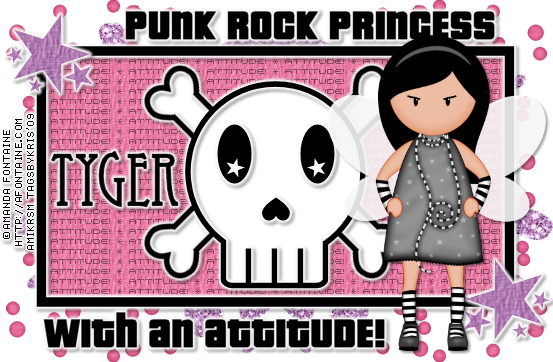
TEMPLATE Template 36 by Kristin
TUBE: Artist © Amanda Fontaine
Her art is no longer available but I purchased it from AMI
SCRAPKIT: Boneheads by Tygers Tidbits
Okay lets begin
Open your template
CTRL+D to duplicate
Close your original
Delete your copyright information
Select your rectangle fill layer
Select all, float, defloat
Open paper 11, copy and close
New raster layer
Paste into selection
Select your stars layer
Do the same as above but use paper 10
Selecty your word layer and use the following settings to turn it black
Also do this to your smaller words

Gradient glow to the bigger words and drop shadow
Use the gradient glow and drop shadow for the stars and black skull
Open glitter splat 2
Resize to an appropriate size
copy and paste
Move right on top of your white layer
Image duplicate - mirror
Merge down
Duplicate - flip
Do the same for confetti4
Merge visible
Add your tube, text and copyright
Thanks for using my tutorial.
I hope it was quick and easy for you.

This tag was made from Steph's Noted Kit and a template from Melissa's Creationz.

SUPPLIES
TEMPLATE: SC hot summer template
Artist © PinupToons.
In order to use the image in this tutorial you MUST purchase it from CILM
SCRAPKIT: Just July by C. C. Creationz
Sunset beach image: HERE
Wordart: Here
Okay lets begin
Open your template
CTRL+D to duplicate
Close your original
Delete your copyright information
Resize by 71%
Select your bottom layer
Select all, float, defloat
Open paper 12
Copy and close
New raster layer
Paste into selection
Do the same for the rest of your layers
Delete the palm trees layer
Open your beach image
Copy and close
Select your circle layer
Select all, float, defloat
New raster layer
Paste into selection
Selections - modify - select selections borders - 4 both sides
New raster layer - fill with the color #fee28e
Add some elements, tube, copyright and text and your done.
I've also supplied my wordart.
Thanks for using my tutorial.

SUPPLIES:
SCRAPKIT: Simply Sassy by Wicked Princess Scraps
Artist © Keith Garvey.
In order to use the image in this tutorial you MUST purchase it from MPT
MASK: WSL_Mask317
Okay lets begin...
New raster layer 500 x 500 px
Open Frame4
Resize 50%
Copy and paste as new layer
Free rotate 45 degrees, more to the left top corner
Duplicate, rotate 15%
Move to the bottom right corner
Open paper of choice
Apply your mask
Get your magic wand and select the inside of the one of the frames
Expand by 5
Open paper of choice, copy and close
New raster layer
Paste into selection
Move behind the frame
Do the same for the other frame
Open your glitter and place it on top of your mask layer
Image duplicate, mirror, merge down
duplicate, flip, merge down
Add your tube and elements
Merge visible.
Don't forget your copyright

SUPPLIES:
Template: MC_Template37
Scrapkit: Love Hurts by Tootsie's Creationz
Tube: I am using the art of ©Sandra Lusquin,
if you want to use her art you have to email her for permission.
Okay lets begin...
Open your template
CTRL + D to duplicate and close the original
Delete the copyright layer
Resize 91%
Delete the circle layer
Get your magic wand and select the top rectangle
Open your paper of choice, copy, close
New raster layer, paste into selection
Do the same with the rest of the rectangles.
For the frame and brush layers
Select all, float defloat
New raster layer
Fill with silver pattern
Delete your template layer
Now for your squares
Do the same as above but picking different papers
Also repeat the steps above for the frames
Turn your wordart black using the following settings for hue/sat/lue
Add drop shadows to your frame layers 2, 2, 30, 2 black
Add your tubes, erasing the parts of the images outside the boxes
Add some elements, merge visible and your done.
Don't forget your copyright :-)

SUPPLIES
TAG TEMPLATE: Template 22 by Simply Devilish Scrapz
KIT: Love Story by Missy
Artist © PinupToons.
In order to use the image in this tutorial you MUST purchase it from CILM
MASK: WSL180
Okay lets begin.
Open your template
CTRL+D to duplicate
Close your original
Delete the copyright layer
Resize 83%
Delete your heart layers
Activate your rectangle layers
Select all - float - defloat
New raster layer
Fill with ##a226ba
Invert and delete
delete your gray layer
Xero - Fritillary
Standard settings, maybe adjust the variation some.
Do the same with the hearts but with paper 1
Merge visible
Open paper 2
Copy and paste as new layer
Open Frame 1, resize by 13%
Copy and paste as new layer
Get your magic wand and select the inside of the frame
Expand by 5
Select your paper layer
Invert and delete
Add your tubes behind the frame now
Apply your mask of choice
Add your elements, text and copyright and your done :-)

SUPPLIES
Template: Template 8 by Simply Tami Designs
Artist © PinupToons.
In order to use the image in this tutorial you MUST purchase it from CILM
Scrapkit: Cute as a Bug by As Sweet As Honey Scraps
Mask: WSL_Mask245
Okay lets begin...
Open your template
CTRL+D to duplicate
Close your original
Delete the copyright layer
Select the bottom rectangles layer
Open paper 10 and paper 5
Copy paper 10 and go back to your template
Get your magic wand and select the inside of the bottom rectangle
New raster layer
Paste into selection
Select none.
Now select the outside frame of the bottom rectangle
Open paper 5 and copy
New raster layer, paste into selection
Do the same for the other rectangles using the following papers.
Rectangle 1 = Paper 5 and Paper 6
Rectangle 2 = Paper 7 and Paper 10
Rectangle 3 = Paper 6 and Paper 7
drop shadow = 2, 2, 30, 2, black
bottom heart = paper 8
top heart = paper 1
heart frame = paper 10
drop shadow = 2, 2, 30, 2, black
insert your tube
drop shadow = 3, 3, 40, 2, black
Open flower 3
resize 30%
Paste as new layer
Open bow 5
resize 25%
Paste as new layer
Open stamp
Resize 30%
free rotate 15% right
Paste as new layer
Open flair 1
Resize 25%
Copy and paste as new layer
Add copyright and text and your done.

SUPPLIES:
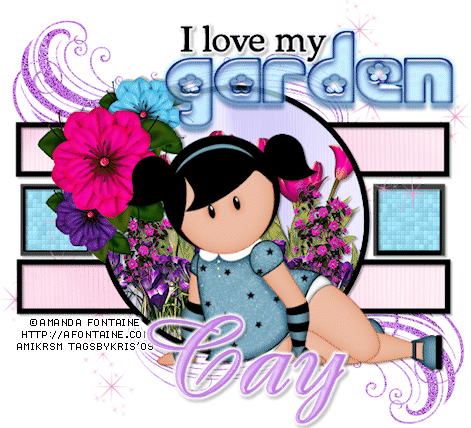
SCRAPKIT: Little Mess by Manda'z Dazzling Dezignz
TUBE: Artist © Amanda Fontaine
Her art is no longer available but I purchased it from AMI
Okay lets begin
Open your mask and minimate it
Open your template
Ctrl+D to duplicate
Close your original
Open paper 5
Copy and paste as new layer
Layers - arrange - send to bottom
Apply your mask
Merge group
Resize if desired
Activate raster 3 layer
Select all, float, defloat
New raster layer
Open paper 4
Copy and close
Edit - paste into selection
Select none
Delete your raster 3 layer
Activate raster 4 layer
Select all, float, defloat
New raster layer
Open paper 3
Copy and close
Edit - paste into selection
Select none
Delete your raster 4 layer
Activate raster 5 layer
Select all, float, defloat
New raster layer
Open paper 18
Copy and close
Edit - paste into selection
Select none
Delete your raster 5 layer
Activate raster 2 layer
Select all, float, defloat
New raster layer
Open paper 18
Copy and close
Edit - paste into selection
Select none
Delete your raster 2 layer
Activate merged layer
Select all, float, defloat
New raster layer
Open paper 5
Copy and close
Edit - paste into selection
Select none
Delete your merged layer
Activate promoted selection layer
Select all, float, defloat
New raster layer
Open paper 8
Copy and close
Edit - paste into selection
Select none
Delete your promoted selection layer
Add your tube
Resize as needed
Add your flowers
I resized by 20%
Add drop shadows to all your layers
Merge visible
Add any other elements, word art, etc
Don't forget your copyrights :-)
Thanks for giving my tutorial a shot.
I'd love to see your results :-)

SUPPLIES
TAG TEMPLATE: #80 by Melissaz Creations
SCRAPKIT: Papyrus by Gemini Creationz
Okay lets begin...
Open your template
Ctrl+D to duplicate
Close the original
Delete your copyright image
Activate dark circle layer
Select all, float, defloat
New raster layer
Open paper 4
Copy and close
Edit - paste into selection
Select none
Delete your dark circle layer
Activate light circle layer
Select all, float, defloat
New raster layer
Open paper 12
Copy and close
Edit - paste into selection
Select none
Delete your light circle layer
Activate rectangle layer
Select all, float, defloat
New raster layer
Open paper 8
Copy and close
Edit - paste into selection
Select none
Delete your rectangle layer
Activate rectangle frame layer
Select all, float, defloat
New raster layer
Open paper 7
Copy and close
Edit - paste into selection
Select none
Delete your rectangle frame layer
Activate squares layer
Select all, float, defloat
New raster layer
Open paper 14
Copy and close
Edit - paste into selection
Select none
Delete your squares layer
Activate squares layer
Select all, float, defloat
New raster layer
Open paper 14
Copy and close
Edit - paste into selection
Select none
Delete your squares layer
Activate swirles layer
Select all, float, defloat
New raster layer
Open paper 3
Copy and close
Edit - paste into selection
Select none
Delete your swirls layer
Move it below your rectangle layer in your layer pallete
Add about 50 noise
Activate square frames layer
Select all, float, defloat
New raster layer
Open paper 4
Copy and close
Edit - paste into selection
Select none
Delete your square frames layer
Activate sm top circle layer
Select all, float, defloat
New raster layer
Open paper 6
Copy and close
Edit - paste into selection
Select none
Delete your sm top circle layer
Resize your tag by 91%
Open the fairy
Resize by 73%
Copy and paste as new layer
Select your square layer
Open the swirl
Resize by 20%
Copy and paste as new layer
Resize your swirl so that it fits in the frame
Erase any extra parts outside the frame
Position on the left square
Duplicate and mirror
Adjust so it fits in your frame
Open flower 4
Resize by 40%
Place over the small circle
Open flower 3
Resize by 40%
Place over flower 4
Add drop shadows to all your layers
Merge visible
Add your text and your done.


