ARTWORK: Artist © Elias Chatzoudis
In order to use the image in this tutorial you MUST purchase it from MPT
SCRAPKIT: Missy of Scraps with Attitude
TEMPLATE: Pbs-Template79
FONT: Venus Rising
Okay lets begin
Open your template
CTRL-D to duplicate
Close the original
Delete the copyright layer
Select your bottom layer
Open your paper of choice
Edit - copy
Close the paper
Select all, float, defloat
New raster layer
Paste into selection
Delete the original layer
do the same with the rest of the layers.
The elements I used for tag are listed below
Resize them appropriately, usually about 50%
Just Copy and paste them as a new layer
See my tag for placement
Add drop shadows
SWA_HPElement56
SWA_HPElement7
SWA_HPElement47
Add your tube
Add your copyright and text
Merge visible and your done

ARTIST: Artwork © Keith Garvey.
In order to use the image in this tutorial you MUST purchase it from MPT
SCRAPKIT: Crush by Missy of Scraps with Attitude
MASK: WSL_Mask84
FONT: PFChampionScriptPro
Okay lets begin
New image 600 x 600
Open Crush_Paper3
Copy and close
New raster layer
Select all
Paste into selection
Apply your mask
Merge group
Open Crush_Frame2
Copy and close
Paste as new layer
The elements I used for tag are listed below
Resize them appropriately, usually about 50%
Just Copy and paste them as a new layer
See my tag for placement
Add drop shadows
Crush_Bubbles
Crush_ButterfliesSwirl
Crush_Butterfly1
Crush_CurlyRibbon1
Crush_Dice1
Crush_Flower
Crush_Flower2
Crush_Fruit
Add your tube
When you are done
Add your copyright and text
Merge visible and your done

ARTIST: Artwork © Keith Garvey.
In order to use the image in this tutorial you MUST purchase it from MPT
SCRAPKIT: PlayToy by Missy of Scraps with Attitude
MASK: Of choice.
Okay lets begin
New image 600 x 600
Open Playtoy_Paper9
Copy and close
New raster layer
Select all
Paste into selection
Apply your mask
Merge group
Open Playtoy_RoundFrame1
Resize as needed
Copy and close
Paste as new layer
Add your close up tube behind the frame
Change your mode to Source Luminance
The elements I used for tag are listed below
Resize them appropriately, usually about 50%
Just Copy and paste them as a new layer
See my tag for placement
Add drop shadows
Playtoy_Flower1
Playtoy_Flower2
Playtoy_FuzzyHeart3
Playtoy_GlassHeart2
Playtoy_Glitter1
Playtoy_PinnedHeart2
Playtoy_SatinBow1
Playtoy_WordArt1
Add your full tube
When you are done
Add your copyright and text
Merge visible and your done

ARTIST: Artwork © Keith Garvey.
In order to use the image in this tutorial you MUST purchase it from MPT
SCRAPKIT: Bandana Denim by Missy of Scraps with Attitude
MASK: Of choice.
Okay lets begin
New image 600 x 600
Open Bandana-n-Denim_Paper10
Copy and close
New raster layer
Select all
Paste into selection
Apply your mask
Merge group
Open frame
Resize as needed
Copy and close
Paste as new layer
Add your tube
The elements I used for tag are listed below
Resize them appropriately, usually about 50%
Just Copy and paste them as a new layer
See my tag for placement
Add drop shadows
Bandana-n-Denim_Bow1
Bandana-n-Denim_Brad1
Bandana-n-Denim_Brad2
Bandana-n-Denim_Brad3
Bandana-n-Denim_Brad4
Bandana-n-Denim_Brad5
Bandana-n-Denim_Branch
Bandana-n-Denim_Butterfly1
Bandana-n-Denim_Flower1
Bandana-n-Denim_Flower5
Bandana-n-Denim_Glitter
Bandana-n-Denim_Lips2
When you are done
Add your copyright and text
Merge visible and your done

ARTIST: Artwork © Keith Garvey.
In order to use the image in this tutorial you MUST purchase it from MPT
SCRAPKIT: Skull Punk by Missy of Scraps with Attitude
TEMPLATE: MC_Template2
Okay lets begin
Open your template
CTRL-D to duplicate
Close the original
Delete the copyright layer
Select your bottom layer
Open your paper of choice
Edit - copy
Close the paper
Select all, float, defloat
New raster layer
Paste into selection
Delete the original layer
do the same with the rest of the layers.
The elements I used for tag are listed below
Resize them appropriately, usually about 50%
Just Copy and paste them as a new layer
See my tag for placement
Add drop shadows
SkullFunk_bowString
SkullFunk_CrayonScribble3
SkullFunk_FurFlower1
SkullFunk_FurFlower2
SkullFunk_FurFlower3
SkullFunk_Glitter2
SkullFunk_GlitterStar2
SkullFunk_SkullLips4
Add your tube
Add your copyright and text
Merge visible and your done
ARTIST: Artwork © Keith Garvey.
In order to use the image in this tutorial you MUST purchase it from MPT
SCRAPKIT: I Rock by Missy of Scraps with Attitude
TEMPLATE: Template #18
Open your template
Ctrl+D to duplicate
Delete the copyright layer
Activate the bottom layer
Open IRock_Paper5
Copy and close
New raster layer
Paste into selection
Delete the original gray layer
Do the same with the rest of the layers
I used IRock_Paper6 and IRock_Paper20
For the solid layers, I just picked a color from my tag and filled with that color
Add a light white gradient glow to all your layers.
Add a drop shadow to all your layers 3, 3, 20, 3, black
The elements I used for tag are listed below
Resize them appropriately, usually about 50%
Just Copy and paste them as a new layer
See my tag for placement
Add drop shadows
IRock_Star1
IRock_GlitterTrail3
IRock_Heart1
I also moved the wordart to the top to accomidate my tube
Add your tube and add a light drop shadow
When you are done
Add your copyright and text
Merge visible and your done

SUPPLIES:
Artist © Ismael Rac.
In order to use the image in this tutorial you MUST purchase it from AMI
SCRAPKIT: Say What? by Schnegge
MASK: Of choice
New image 500 x 500
Open paper 1
Copy and close
New raster layer
Select all
Paste into selection
Apply your mask of choice
Open frame10
Resize by 97%
Copy and close
Paste as new layer
Get your magic wand and select the inside of the frame
Expand by six
Open paper 5
Copy and close
New raster layer
Paste into selection
Open your black flowers
Resize by about 75%
Copy and paste as new layer
See my tag for placement
Duplicate and move down some
Open your girls rock star
Resize about 70%
Copy and paste as new layer
See my tag for placement
Open your tube
Add copy and close
Paste as new layer
Delete the part outside the frame
Open your black ribbon
Copy and paste as new layer
Delete the part outside the frame so it appears to be wrapping
Open up the pink bow
Copy and paste as new layer
Move to the center
See my tag for placement
Add any other elements you want to it
Add drop shadows to all layers 2, 2, 40, 3, black
Add your copyright and text
Merge visible and your done :-)

Artist © Keith Garvey.
In order to use the image in this tutorial you MUST purchase it from MPT
SCRAPKIT: Eerie Hauntings by Gothic Inspirations
MASK: Of choice
New image 650 x 500
Open paper 27
Copy and paste as new layer
Apply your mask
Open Frame-GI_EerieHauntings
Copy and paste as new layer
Get your magic wand and select the inside of the frame
Expand by 4
Open Paper 4
New raster layer
Copy and paste into selection
Move beneath your frame layer
Apply your tube and elements of choice
Add drop shadows
3, 3, 40, 3 for the tube and wordart
3, 3, 30, 2 for the rest
Add your copyright and text.
Merge visible and your done.

Artist © Martin Abel.
In order to use the image in this tutorial you MUST purchase it from CILM
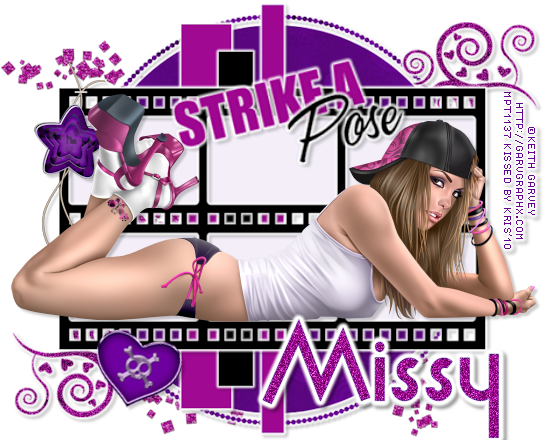
SCRAPKIT: Bad Girlfriend by Missy
TEMPLATE: #31 by Melissaz Creationz
Okay lets begin...
Open your template
CTRL+D to duplicate
Close your original
Delete your copyright information
Select the bottom layer
Open paper of choice, copy and close
Select all float, defloat
New raster layer
Paste into selection
Do the same for the rest of the layers.
Add your elements, tube, and copyright information
Duplicate your tube layer
Move her beneath the boxes
Delete the part outside the boxes
Blend mode - hard light
Apply your gradient glows and/or drop shadows
Merge visible and your done.
Add your text

SUPPLIES:
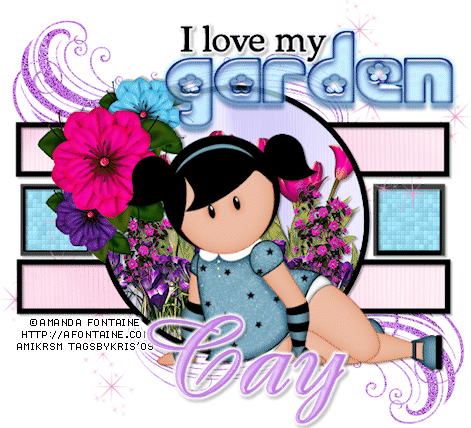
KIT: Beautiful Autumn by Cay's Creations
MASK: Of Choice
TEMPLATE: #12 by Alyssa
TUBE: Artist © PinupToons
In order to use the image in this tutorial you MUST purchase it from CILM
Okay lets begin...
Open your template
CTRL+D to duplicate
Close your original
Delete your copyright information
Select the bottom layer
Open paper of choice, copy and close
Select all float, defloat
New raster layer
Paste into selection
Do the same for the rest of the layers.
Open a paper for your mask
Copy and paste as new layer
Apply your mask of choice
Add your elements, tube, and copyright information
Apply your drop shadows and/or gradient glows
Add your text and your done.

SUPPLIES:
TEMPLATE: TagTemplate48 by Missy
TUBE: Artist © Cris de Lara.
In order to use the image in this tutorial you MUST purchase it from MPT
SCRAPKIT: Tranquility by Tantalizing Designz
BLING: Made by Me but I lost the file, so any heart bling will do.
Okay lets begin...
Open your template
CTRL+D to duplicate
Close your original
Delete your copyright information
Resize canvas to 500 x 500
Select the bottom layer
Open paper 21, copy and close
Select all float, defloat
New raster layer
Paste into selection
Do the same for the rest of the layers.
When you get to your frame layer
Select a color from your tag
New raster layer
Frame layer - select all - float - defloat, invert
Select the color layer - and hit delete
Add Gradient Glow to all your layers
I used the color #6b5957
Add drop shadow 2, 2, 30, 3 black
Add your tube and drop shadow
Add some elements and copyright also any text you want
Pretty much finish up your tag before we add the bling
After your done, merge your tag
Save as pspanimation
Open your bling and tag up in AS
Delete the black layer on your bling
Duplicate your tag until you have 18 frames
Select all on both
Drag your bling onto your tag
Save as a gif and your done.
Thanks for trying my tutorial. I'd love to see your results.

SUPPLIES:
Template: MC_Template37
Scrapkit: Love Hurts by Tootsie's Creationz
Tube: I am using the art of ©Sandra Lusquin,
if you want to use her art you have to email her for permission.
Okay lets begin...
Open your template
CTRL + D to duplicate and close the original
Delete the copyright layer
Resize 91%
Delete the circle layer
Get your magic wand and select the top rectangle
Open your paper of choice, copy, close
New raster layer, paste into selection
Do the same with the rest of the rectangles.
For the frame and brush layers
Select all, float defloat
New raster layer
Fill with silver pattern
Delete your template layer
Now for your squares
Do the same as above but picking different papers
Also repeat the steps above for the frames
Turn your wordart black using the following settings for hue/sat/lue

Add drop shadows to your frame layers 2, 2, 30, 2 black
Add your tubes, erasing the parts of the images outside the boxes
Add some elements, merge visible and your done.
Don't forget your copyright :-)

SUPPLIES
TAG TEMPLATE: Template 22 by Simply Devilish Scrapz
KIT: Love Story by Missy
Artist © PinupToons.
In order to use the image in this tutorial you MUST purchase it from CILM
MASK: WSL180
Okay lets begin.
Open your template
CTRL+D to duplicate
Close your original
Delete the copyright layer
Resize 83%
Delete your heart layers
Activate your rectangle layers
Select all - float - defloat
New raster layer
Fill with ##a226ba
Invert and delete
delete your gray layer
Xero - Fritillary
Standard settings, maybe adjust the variation some.
Do the same with the hearts but with paper 1
Merge visible
Open paper 2
Copy and paste as new layer
Open Frame 1, resize by 13%
Copy and paste as new layer
Get your magic wand and select the inside of the frame
Expand by 5
Select your paper layer
Invert and delete
Add your tubes behind the frame now
Apply your mask of choice
Add your elements, text and copyright and your done :-)

SUPPLIES
Template: Template 8 by Simply Tami Designs
Artist © PinupToons.
In order to use the image in this tutorial you MUST purchase it from CILM
Scrapkit: Cute as a Bug by As Sweet As Honey Scraps
Mask: WSL_Mask245
Okay lets begin...
Open your template
CTRL+D to duplicate
Close your original
Delete the copyright layer
Select the bottom rectangles layer
Open paper 10 and paper 5
Copy paper 10 and go back to your template
Get your magic wand and select the inside of the bottom rectangle
New raster layer
Paste into selection
Select none.
Now select the outside frame of the bottom rectangle
Open paper 5 and copy
New raster layer, paste into selection
Do the same for the other rectangles using the following papers.
Rectangle 1 = Paper 5 and Paper 6
Rectangle 2 = Paper 7 and Paper 10
Rectangle 3 = Paper 6 and Paper 7
drop shadow = 2, 2, 30, 2, black
bottom heart = paper 8
top heart = paper 1
heart frame = paper 10
drop shadow = 2, 2, 30, 2, black
insert your tube
drop shadow = 3, 3, 40, 2, black
Open flower 3
resize 30%
Paste as new layer
Open bow 5
resize 25%
Paste as new layer
Open stamp
Resize 30%
free rotate 15% right
Paste as new layer
Open flair 1
Resize 25%
Copy and paste as new layer
Add copyright and text and your done.

SUPPLIES
TEMPLATE: Template #16 by Chica
SCRAPKIT: Ice Diamond by Cay's Creations
Artist © Keith Garvey.
In order to use the image in this tutorial you MUST purchase it from MPT
Okay lets begin
Open your template
CTRL+D to duplicate
Select Circles
Open pp_013
Copy and paste as new layer
Select circles again
Select all - float - defloat
Select your paper layer
Invert and delete
Delete Circles layer
Do the same for the rest of the layers up using the following papers
Rectangles - paper 16
Square back - paper 6
hearts - paper 10
sweet/sugar wordart - paper 4
girl wordart - paper 9
select the garv wordart
shift+h
use the following settings

Open cayscreation_icediamond-el_023 and resize 8%
Copy and paste as new layer
Move over the doodle in the template
Duplicate and mirror
Delete the template layer
Open cayscreation_icediamond-el_014
Resize 10%
Copy and paste as new layer
Move on top of the square frame on the right corner
Image - duplicate
Image - mirror
Merge down
Image - duplicate
Image - flip
Move your bottom to fit the bottom of your frame
Open cayscreation_icediamond-el_055
Resize by 6%
Copy and paste as new layer
Place over your back right circle
Image - duplicate
Image - mirror
Merge down
Image - duplicate
Image - flip
Move your bottom to fit your bottom circles
Open your tube of course this particular one needs to be by Keith Garvey
paste as new layer and delete the extra parts out of the frame on the bottom
Add your drop shadows and apply your gradient glows or outlines if you so choose
Add your copyright info and text and your done.

SUPPLIES
Artist © Dominic Marco.
In order to use the image in this tutorial you MUST purchase it from CILM
SCRAPKIT: Tangerine Dreams by Baby Cakes Scraps
New Image 500 x 500
Open your tube of choice (I'm using the wonderful work of Dominic Marco)
Open BCS_Square Frame and BCS_Scatter Dush
resize each so that the longest side is no larger than 500 pixels
Copy and paste as new layer on your new image
Layer pallate should be like the following
tube
frame
dust
background
Now select your frame layer and resize by 60%
Free rotate by 25% to the right
Move your frame towards the top left corner
See my tag for placement
Image duplicate
Image mirror
Image flip
I moved my bottom frame over see my tag for placement
Select your dust layer
Resize by 90%
Image-mirror
Open BCS_Paper One
Copy and paste as new layer
Get your magic wand and select the inside of the top frame
Expand by 8
Select your paper layer
Invert and delete
Open BCS_Paper Eighteen and do the same as you did on the top frame to the bottom one.
Open BCS_Doodle Four and place it behind the frames and paper but on top of the dust
Add other elements to your liking, most of the elements I added I resized by about 30% or so.
After your done, close off your background layer, add your drop shadows and merge visible.
Duplicate the layer.
Adjust-blur-gaussian blur - 10
Effects - texture - mosiac antique

Add your copyright and text and your done.
I hope you enjoyed my tutorial.